Learning Goals
At the end of this Tutorial, you will be able to:
- Demonstrate your knowledge of ReactJS by populating and responding to a series of 10 multiple-choice quizzes.
Downloading the Quiz app
Your first step is to download the Quiz app. Here are the steps:
- In your web browser, go to the GitHub repo below. It will open in a new browser tab. https://github.com/brendan-munnelly/quiz-app
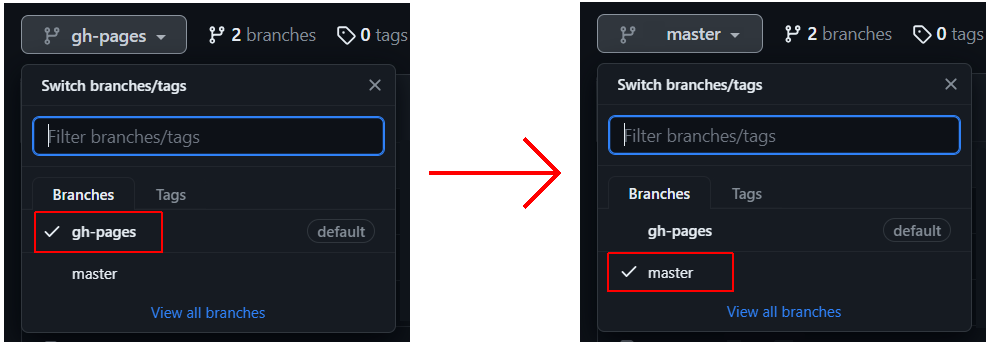
- Near the top-left of the repo screen, change the Git branch from gh-pages to master.
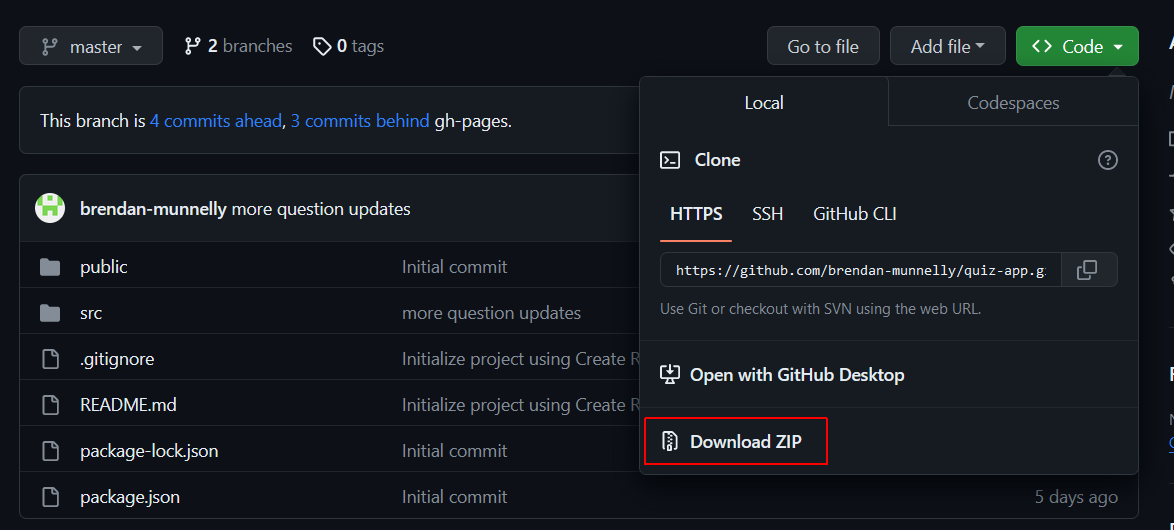
- Next, near the top-right of the screen, click the green Code button and then select the Download ZIP option.
- Extract the downloaded ZIP file to a local folder on your computer.
- Open a Command Prompt or VS Code Terminal and navigate to the folder where you have downloaded and unzipped the Quiz app. For example:
C:\react\apps\quiz-app>
- In this Quiz app folder, install the dependencies needed by the app:
npm install - When this process completes, run the command below to launch the downloaded app on your ReactJS development server. It will default to port 3000:
npm start
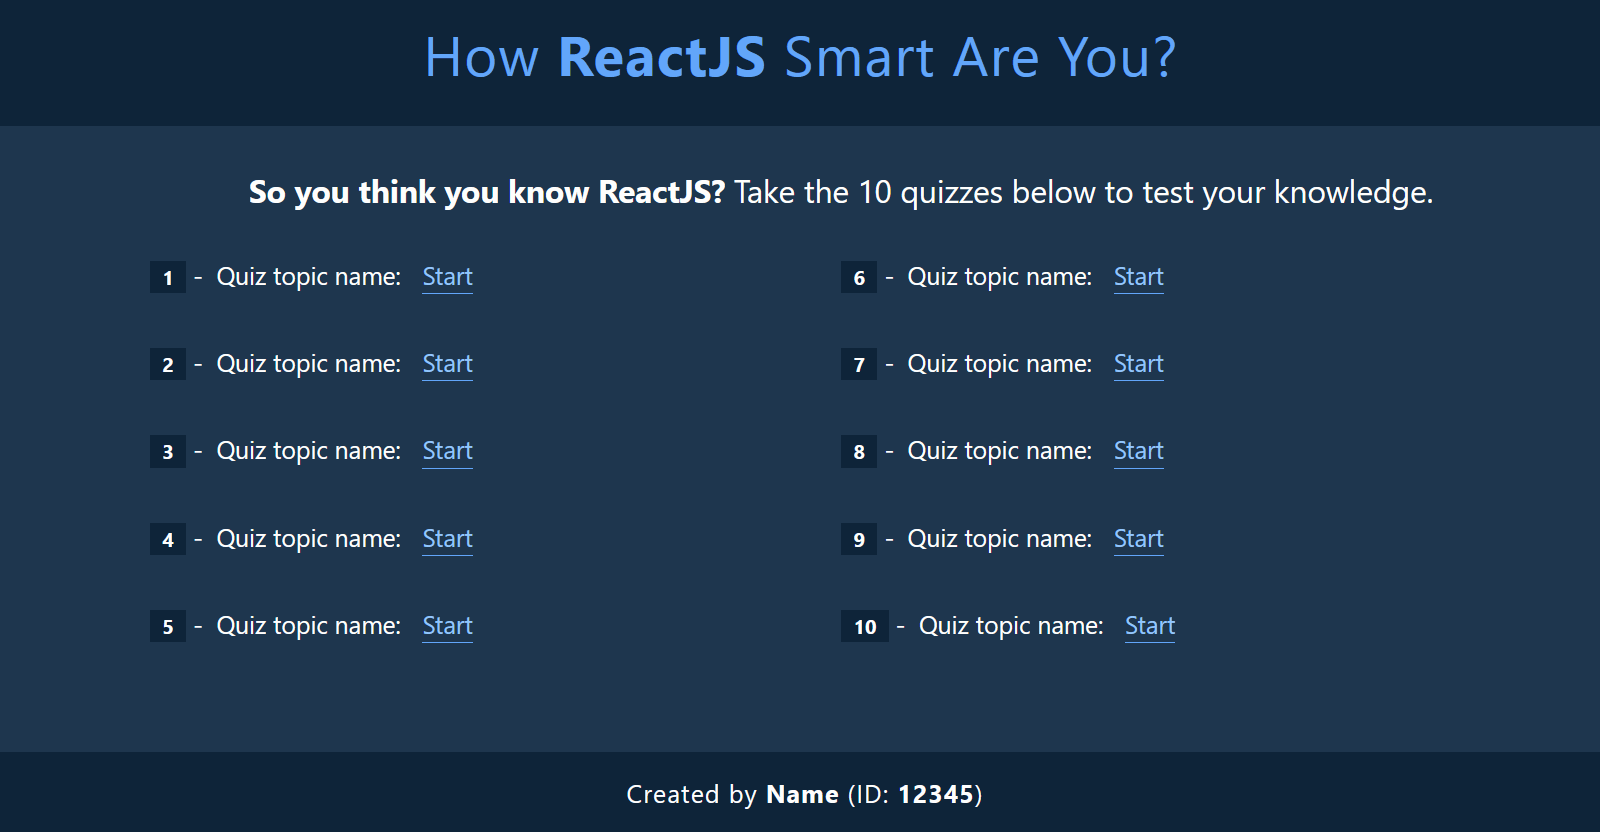
View the app in your web browser to verify it has downloaded correctly. It should look similar to the following.
ReactJS: What do you want to learn?
Make a list of the topics in ReactJS that you would like to learn and be tested on. You should also include some topics related to modern JavaScript syntax. Here is a sample list:
- Ternary and null coalescing operators
- Array and object destructuring
- Installing Node.js and npm
- Working with create-react-app
- JSX syntax
- Funtional components
- Components and props
- Conditional rendering
- Component composition and reusability
- Rendering lists and keys
- User click events
- SPAs and routing
- State variables
- The useState hook
- The useEffect hook
- CRUD operations
- Form handling
For further inspiration, enter the following search terms to your favourite search engine:
React interview questions
Format of the questions and answers
In the /src folder of the Quiz app is a sub-folder named /data that contains 10 files.

In each file is an array of questions objects. Each object has the following properties:
- question: The text of the question.
- choices: An array with four possible answers.
- correctAnswer: The text of the correct answer.
When you prompt ChatGPT or other AI for content, this is the format in which you will want the AI to respond.
Generating content with ChatGPT
Follow the steps below:
- Access ChatGPT and click the New chat icon.

- Paste and run the prompt below.
You are an expert developer and instructor in ReactJS. Your task is to help me generate 10 multiple-choice quizzes to help me improve and test my knowledge of ReactJS.


    * Each quiz will contain 10 questions.


    * Each question will have 4 possible answers, only one of which is correct.


    * Each quiz will consist of an array of objects and be stored in files with the names quizQuestions1.js,  quizQuestions2.js and so on.


    * Each question will be in the following format:


    {

            question: 'Which of the following keywords is used to define
    a variable in JavaScript?',

            choices: ['var', 'let', 'var and let', 'None of the above'],

            correctAnswer: 'var and let',

        },


Please respond with "Read" to acknowledge you understand. - ChatGPT should respond as shown below.

- In the left sidebar, give this chat session a descriptive name. For example, ReactJS Quiz.

- You are now ready to enter the prompts for your 10 quizzes. See the example below.
Please generate a quiz on the topic of functional components and props in ReactJS. Focus on the fundamentals and how functions in ReactJS may differ slightly to functions in plain JavaScript. - You may need to revise and re-enter the prompts to help ChatGPT focus on the topics you want to include in any one particular quiz. For example.
Please re-generate this quiz without mentioning class components. Also, do not include state in ReactJS. I will cover that topic in a separate quiz. - When you are happy with the content generated by ChatGPT, copy the content to the quizQuestions1.js or other data file.
 Do not change the name of the array.
 - Open the Home.js page component and update the text describing your quiz. See the example below.

Repeat the steps above until you have populated all 10 quizzes.
Generating content with GitHub CoPilot Chat
If you have GitHub Copilot installed in VS Code, you can install a related extension named GitHub Copilot Chat and use it to generate quiz content. Follow these steps:
- In VS Code, install the extension in the usual way.

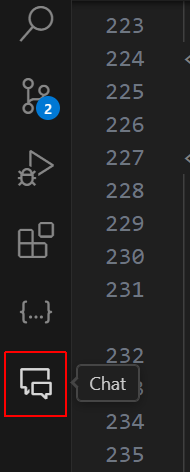
- You will now see a new Chat icon in the left vertical sidebar. Click this to toggle the display of the Chat window.
- Widen the Chat window and enter a prompt such as the following.
Please generate a multiple-choice quiz of 10 questions on the topic of function components and props in ReactJS. Do not mention class components or state. Name the properties in each question object as "question", "choices", and "correctAnswer". - If you are happy with the output, use the Copy or Insert at Cursor icon to add the prompt response to your currently open and active VS Code file.
Generating content with Google Bard
Another option for generating quiz content is the free Google Bard service. Follow these steps:
- Access Google Bard. It will open in a new browser tab.
- Paste and run the prompt below.
You are an expert developer and instructor in ReactJS. Your task is to help me generate 10 multiple-choice quizzes to help me improve and test my knowledge of ReactJS.


  * Each quiz will contain 10 questions.


  * Each question will have 4 possible answers, only one of which is correct.


  * Each quiz will consist of an array of objects and be stored in files with the names quizQuestions1.js, quizQuestions2.js and so on.


  * Each question will be in the following format:


  {

      question: 'Which of the following keywords is used to define
    a variable in JavaScript?',

      choices: ['var', 'let', 'var and let', 'None of the above'],

      correctAnswer: 'var and let',

  },


Please respond with "Read" to acknowledge you understand. - Google Bard should respond as shown below.

- Next, enter a prompt such as the following.
Please generate a multiple-choice quiz of 10 questions on the topic of function components and props in ReactJS. Do not mention class components or state. Name the properties in each question object as "question", "choices", and "correctAnswer". - If you are happy with the output, copy-and-paste the prompt response to your Quiz app.
Building and publishing your Quiz app
You are ready to build your Quiz app for publishing to GitHub Pages when you have:
- Added your name and student ID to the Footer.js component file.
- Populated the 10 question files in the src/data sub-folder.
- Updated the quiz titles in the Home.js page component file.
Follow these steps:
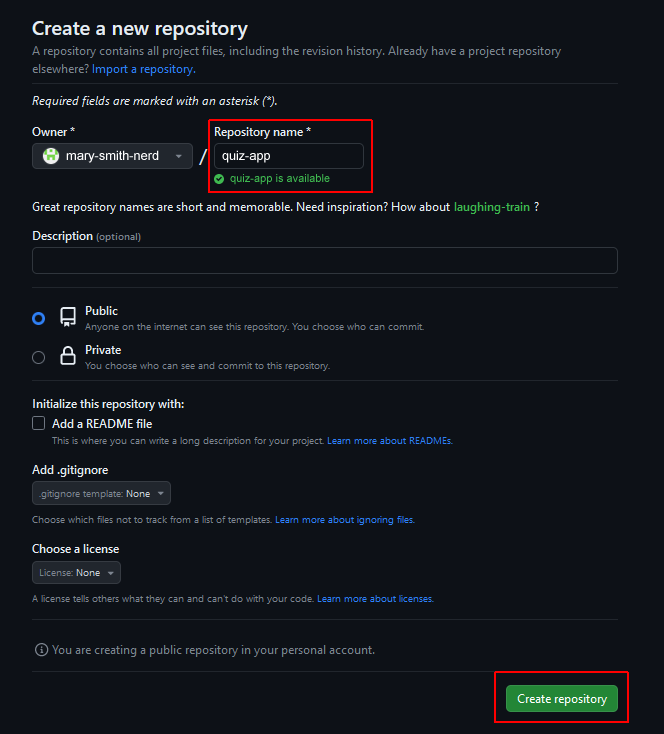
- Sign into your GitHub account and create a new repo to host your Quiz app.
 Give your new repo a name such as quiz-app or similar. But do not initialise it with README, license, or .gitignore files. Your new repo should be empty.
- In VS Code, open your Quiz app’s package.json file and add the following line after the opening curly brace { at the top of the file:
"homepage": "https://username.github.io/repo-name/",
Replace username with your GitHub username and repo-name with the name of your new repo. This will be quiz-app or similar. For example:"homepage": "https://mary-smith-nerd.github.io/quiz-app/",
- Also in the package.json file, add these two scripts to the end of the scripts section:
"scripts": { // ... other scripts here, "predeploy": "npm run build", "deploy": "gh-pages -d build" } - Install the GitHub Pages package below in your Quiz app folder.
npm install gh-pages --save-dev
- Next, in your Quiz app folder, run the command below.
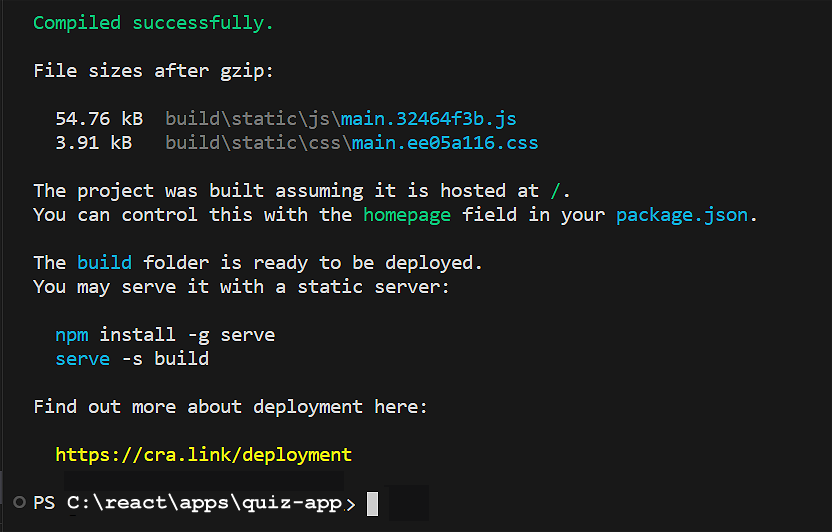
npm run build - When the process completes, you should see a message similar to the following:
- Initialise Git for the folder that contains your app.
git init - Git does not automatically track changes to the files in your app folder. You need to add them with this command:
git add . - Next, commit the latest version of your files to Git with a helpful message:
git commit -m "Initial commit"
- Your next step is to link your local Git repo to your remote GitHub repo. Enter this command:
git remote add origin https://github.com/username/repo-name.gitReplace username with your GitHub account username and repo-name with the quiz-app or similar. For example:git remote add origin https://github.com/mary-smith-nerd/quiz-app.git - Push your app to the main (or master) branch on GitHub.
git push origin main - After completing all the above steps, run the command below from inside your Quiz app folder to deploy your app for hosting on GitHub Pages:
npm run deploy
✅ Finished!
You can now access your deployed ReactJS app at a web address similar to the following:
https://username.github.io/repo-name
Updating your published ReactJS app
Over time, you may make changes to your app and wish to deploy the new version to GitHub Pages. Here are the steps:
- Update and save your app on your local server.
- From inside your app folder, update the ‘build’ version of your app for deployment.
npm run build - Add your updates to Git version control.
git add . - Commit the latest version of your files to Git with a helpful message.
git commit -m "New feature added"
- Push your changes to the main (or master) branch on GitHub.
git push origin main - Finally, deploy your updated app for hosting on the gh-pages branch.
npm run deploy
✅ That’s it.
