Learning Goals
At the end of this Tutorial, you will be able to:
- Create a simple counter app to demonstrate how state works in ReactJS.
About state in ReactJS
As you learned in the Working with Props Tutorial, data passed into a functional component as an argument cannot be changed by that component.
Often, however, the reason you create a function is in order for it to change data!
In ReactJS, data inside a function that is changed in some way by the function is called state. Furthermore, ReactJS provides special functions called hooks for managing state (data that can change) inside components.
So if you want to change data in your app, you need to store that in state so that it properly re-rendered once the data actually changes.
The most commonly-used hook is called useState. It enables you to manage state (data that may change) inside a functional component. And when the data changes, the component will re-render the new data to the DOM.
Components that do not change the value of their props have no state - they are said to be stateless components.
In this Tutorial, you will create a simple counter app to demonstrate how state works in ReactJS.
Creating your counter app with CRA
Follow the steps below.
- In VS Code, choose Terminal | New terminal and navigate to the folder where you want ReactJS to create a folder for your app.
- Type the following command that includes the name you want to call your new app.
npx create-react-app reactjs-hooks - Wait few minutes for the app to be built.
- In your command prompt or terminal, display the folder that contains your new app and enter the following
npm start
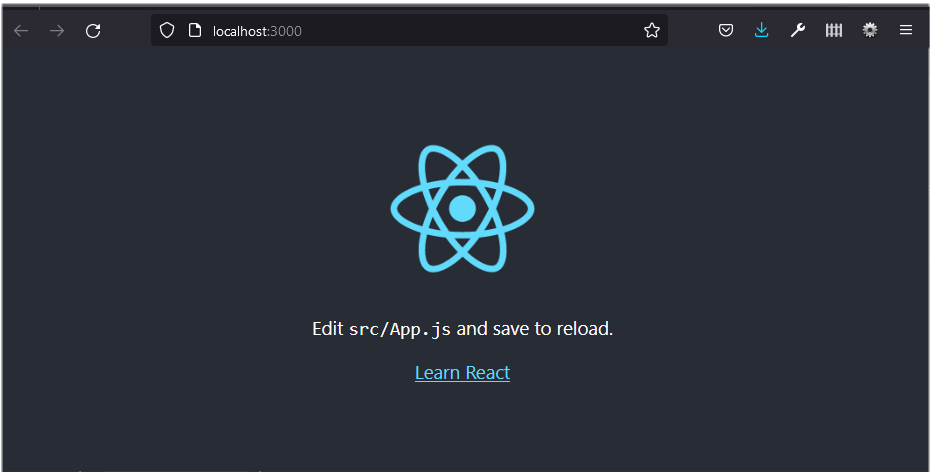
A new browser window should display with your app running on the ReactJS local development server. If not, open a new browser tab and enter http://localhost:3000.
You will see a screen similar to the following.

Customising your app
Your next task is to customise the 'bolierplate' content provided by the create-react-app script.
- Open the index.html file in the /public folder and replace all its content with the following.
<!DOCTYPE html> <html lang="en"> <head> <meta charset="utf-8" /> <meta name="viewport" content="width=device-width, initial-scale=1" /> <title>Minimal React App</title> <meta name="description" content="Minimal website created using create-react-app" /> <link rel="manifest" href="%PUBLIC_URL%/manifest.json" /> </head> <body> <div id="root"></div> </body> </html> - Open the index.js file in the /src folder and replace all its content with the following.
import React from 'react'; import ReactDOM from 'react-dom/client'; import App from './App'; const root = ReactDOM.createRoot(document.getElementById('root')); root.render( <React.StrictMode> <App /> </React.StrictMode> ); - Open the App.js file in the /src folder and replace its content with the following.
function App() { return ( <> <h1>Hello, World!</h1> <p>Paragraph of text.</p> </> ); } export default App;
Your web page should now look as shown below.

Adding a stateful component
Next, you will add a counter component to your basic app.
- In the /src folder, create an IncrementDecrement.js file with the following content.
import React, { useState } from 'react'; function IncrementDecrement() { const [Count, setCount] = useState(0); return ( <div> <button onClick={() => setCount(Count + 1)}>+</button> {Count} <button onClick={() => setCount(Count - 1)}>-</button> </div> ) } export default IncrementDecrement; - Also in the /src folder, update the App.js file with the following content.
import React from 'react'; import IncrementDecrement from './IncrementDecrement'; function App () { return ( <IncrementDecrement></IncrementDecrement> ) } export default App;
Your web page should now look as shown below.

Adding a CSS file
See the steps below.
- Download the following file to your /src folder. Counter.css
- Update your App.js file as follows.
import React from 'react'; import IncrementDecrement from './IncrementDecrement'; import './Counter.css'; function App () { return ( <div className="box-counter"> <IncrementDecrement></IncrementDecrement> </div> ) } export default App;
Your web page should now look as shown below.

How state is updated with a hook
The following explains how state is updated inside the IncrementDecrement.js component.
- At the top of the component, the useState hook is imported as shown below:
import React, { useState } from 'react'; - Next is a functional component that contains the code that will perform the updating.
function IncrementDecrement() { // Code for updating state goes here } - You will want this function to be available to the main or top-level App.js component. So you wiil add an export default instruction at the end of the file.
export default IncrementDecrement; - The main work is performed inside the function with this line:
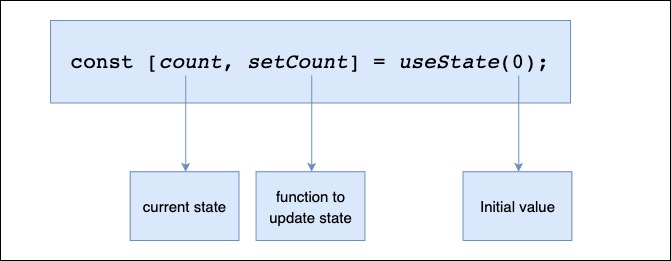
This line does two things:const [Count, setCount] = useState(0);- It declares a new state variable named Count.
- It declares a function named setCount that, when called by the user's click action. will update the current value in the Count state variable.

- Attached to each of the two buttons is an event handler that captures the user's click action.
In ReactJS, event names are written in camelCase (in this case as onClick) and not in JavaScript lowercase style (onclick).
<button onClick= ... ></button> - Another difference is that with JSX you pass a function as the event handler within curly braces {}, rather than a string between quotes "".
// In JavaScript <button onclick="activateLasers()">Activate Lasers</button> // In JSX <button onClick={activateLasers}Activate Lasers</button> - In each case, the event handler is an arrow function that calls the setCount function to update the value in the Count state variable.
<button onClick={ () => // called function goes here }>+</button> - Below is the syntax of the called arrow function.
=> setCount(Count + 1) - And finally, this displays the current value of the Count state. It will be updated and re-rendered every time Count is reset the setCount() updater function.
{Count}