Learning Goals
At the end of this Tutorial, you will be able to:
- Apply CSS style rules to the five hyperlink states: link, visited, focus, hover and active.
In this Tutorial you will style the hyperlinks in the van Gogh and Irish tourism web pages.
Abour the five hyperlink states
On modern websites, hyperlinks will typically display very differently depending on the section of the web page in which they are located.
- Navigation hyperlinks: In navigation menus and footers, hyperlinks are commonly shown without underlines. It is clear to the user, from the links’ location, that these items can be clicked or tapped.

- Hyperlinks within text blocks: When they are located inside paragraphs, however, it is good practice to place underlines beneath hyperlinks to make them stand out from the surrounding text.

- Hyperlinks as buttons: Hyperlinks on a web page can also be displayed as buttons, with coloured backgrounds and/or borders, and perhaps icons. Typically, hyperlinks styled as buttons do not have underlines.

Unlike other web page elements such as headings, paragraphs or images, hyperlinks are interactive. And their visual appearance can change depending on whether and how the user interacts with them.
Hyperlinks are five so-called states, which can be grouped into two categories:
- Passive states: This is how a hyperlink looks when the user is not interacting with it. There are two passive states.
- Interactive states: This is how a hyperlink looks when the user is interacting with it. There are three interactive states.
Hyperlinks: the two passive states
There are two possible passive states for a hyperlink.
- a:link — The link has not been clicked or tapped by the user. By default, web browsers display unvisited hyperlinks in the colour blue.
- a:visited — The link has been previously clicked or tapped by the user. By default, web browsers display visited hyperlinks in the colour purple.

In CSS, you target unvisited and visited hyperlinks in a web page using the :link and :visited pseudo-classes as follows:
/* Passive link - previously unvisited */
    a:link {
    /* style rules go here */
}

/* Passive link - previously visited */
    a:visited  {
    /* style rules go here */
}
Typically, these two passive states are styled in the same way.
/* Passive link states */
    a:link,
    a:visited {
     /* style rules go here */
}
Or, on a single line:
/* Passive link states */
a:link, a:visited {
    /* style rules go here */
}
Note the colon character (:) between the a selector and the pseudo-class name (link or visited).
For example, if you wanted your hyperlinks to appear in red when the user is not interacting with them, you would enter the following.
/* Passive link states */
    a:link, a:visited {
    color: red
}
Hyperlinks: the three interactive states
There are three possible passive states for a hyperlink.
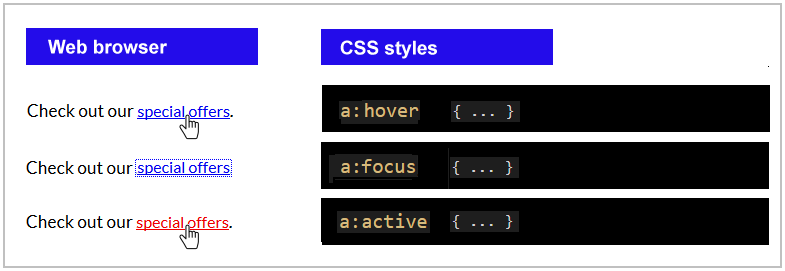
- a:hover — The user is hovering the mouse over the link. By default, web browsers display hovered-over links in blue (if not previously visited) and purple (if visited before by the user).
- a:focus — The user has navigated to the hyperlink by using the Tab key. By default, web browsers display on-focus links with a blue, dashed border.
- a:active — The link is currently being clicked or tapped by the user. By default, web browsers show active hyperlinks in the colour red.

In CSS, you target these three hyperlink states using the :focus, :hover and :active pseudo-classes.
Typically, all three interactive states of a hyperlink are styled in the same way.
/* Interactive link states */
a:focus, a:hover, a:active {
    /* style rules go here */
}
Again, note the colon character (:) between the a selector and the pseudo-class name (focus, hover or active).
For example, if you wanted your hyperlinks to appear in green whenever the user is interacting with them, you would enter the following.
/* Passive link states */
a:hover, a:focus, a:active {
    color: green
}
In summary, the section of a CSS file that styles hyperlinks would typically look as follows:
/* ====== HYPERLINK STYLES ====== */

/* Passive link states */
a:link, a:visited {
    color: red
}

/* Interactive link states */
a:hover, a:focus, a:active {
    color: green
}
Hyperlinks: the correct order of pseudo-classes
In a CSS stylesheet, it is important you place your pseudo-classes in the correct order. Otherwise, your hyperlink styles may not display the way you want them to.
The correct order is as follows:
:link
:visited
:hover
:focus
:active
Hyperlinks and the default underline
By default, web browsers add an underline to all five hyperlink states. This is the result of a default value of underline applied to the text-decoration property.
To ‘turn off’ this default underline, you need to add the following style rule to your CSS file.
/* ====== HYPERLINK STYLES ====== */

/* Passive link states */
a:link, a:visited {
    text-decoration: none;
    color: red;
}

/* Interactive link states */
a:hover, a:focus, a:active {
    text-decoration: none;
    color: green;
}
Except for the special cases of hyperlinks in menus and footers, and as buttons, it is good practice to underline the visited and unvisited states of hyperlinks within blocks of text.
However, to underline hyperlinks, web designers typically use the border-bottom property rather than text-decoration, because it allows more options for spacing and colour.
Styling links in the van Gogh web page
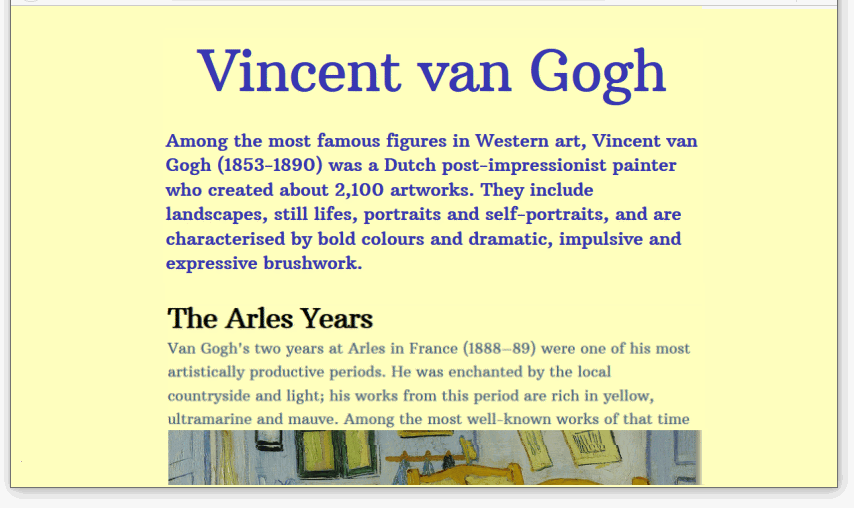
In this task you will apply CSS styles to the hyperlinks you added to the page-4.html sample web page in the previous Introduction to Hyperlinks Tutorial.
- In VS Code, open the style-4.css stylesheet.
- At the bottom of the stylesheet flle, copy-and-paste the following:
/* Passive link styles */

a:link, a:visited {
    text-decoration: none;
    padding-bottom: 2px;
}

/* Interactive link styles */

a:hover, a:focus, a:active {
    text-decoration: none;
    padding-bottom: 2px;
}
You have now grouped the five possible hyperlink states into two categories for styling, and removed the default underline. You have also added a spacing of 2px that will separate the hyperlink text from whatever bottom border you place underneath it. - For the first set of style rules that apply to the :link and :visited hyperlink states, enter the following CSS properties and values:
color: #000;
border-bottom: solid 2px #000;
- For the second set of style rules that apply to three active states of the hyperlink, enter the following CSS properties and values:
color: #f26f21;
border-bottom: solid 2px blue;
- Save your stylesheet. Display the web page in your browser and verify the style changes to the four hyperlinks.

You are now finished working on your first sample web page.
View the page-4.html web page in your browser and verify the styled hyperlinks display correctly.
Styling links in the Tourism web page
In this section you will apply CSS styles to the hyperlinks you added to the page-5.html sample web page in the previous Working with Internal Hyperlinks Tutorial.
- In VS Code, open the style-5.css stylesheet.
- At the bottom of the stylesheet flle, copy-and-paste the following:
/* Passive link styles */
a:link, a:visited {
    text-decoration: none;
    padding-bottom: 2px;
    color: #006600;
    border-bottom: solid 2px #006600;
}

/* Interactive link styles */
a:hover, a:focus, a:active {
    text-decoration: none;
    padding-bottom: 2px;
    color: #f26f21;
    border-bottom: solid 2px blue;
}
- Save your stylesheet and, in your web browser, verify that the hyperlinks in the web page display in their new styles.
You are now finished working on your second sample web page.
View the page-5.html web page in your browser and verify the styled hyperlinks display correctly.
Uploading your files to GitHub
After finishing your web page and stylesheet, you are now ready to upload them to your account on GitHub.
- Open a new tab in your web browser and go to GitHub.com. If you are not already signed in to your GitHub account, sign in now.

- On your GitHub home page, click the ‘repo’ that holds your web pages. Its name will look as follows, where username is your chosen username on GitHub.
username.github.io

- On the next GitHub screen displayed, near the right of the screen, you can see a button named Add file. Click on it.

- From the dropdown list displayed, choose the option Upload files.

- In File Explorer (Windows) or Finder (Apple Mac), drag-and-drop your 📁 exercises sub-folder to upload it to your repository on GitHub.

- Scroll down to the bottom of the GitHub screen, and accept or edit the short message (Add files via upload) in the Commit changes box.
- Finally, click the green Commit changes button to upload your files.

Your updated sample web page are now published on GitHub at web addresses similar to the following:
https://username.github.io/exercises/page-4.html
https://username.github.io/exercises/page-5.html
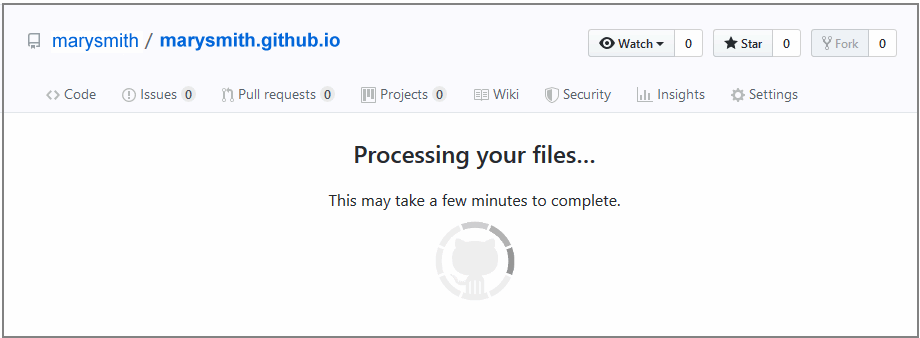
It may take a few minutes for your uploaded files to appear on GitHub.

