Learning Goals
At the end of this Tutorial, you will be able to:
- Select font-weight/style combinations for selected font-families (typefaces) from the Google Fonts website.
- Add selected Google Fonts CSS links to the <head> of a web page.
- Add selected Google Fonts names to the CSS font-family property in a stylesheet file.
About Google Fonts
Google Fonts offers the Internet’s largest collection of open-source, royalty-free fonts. All 900-plus fonts can be used without restriction for personal, not-for-profit or commercial web projects.
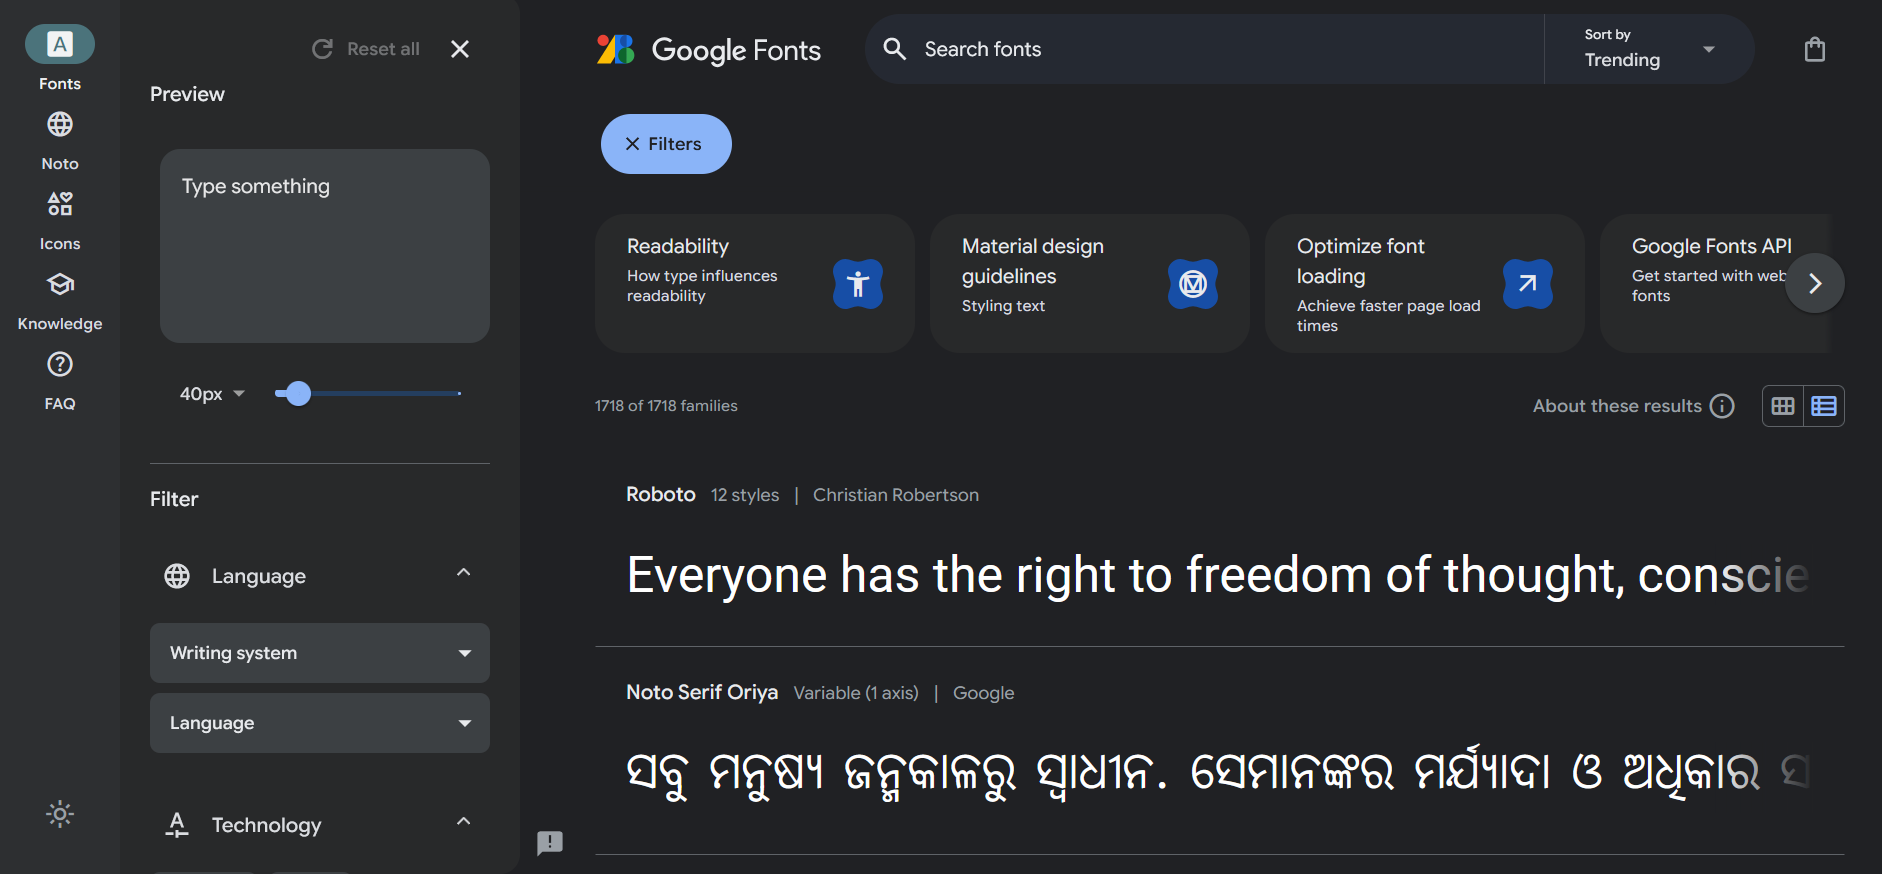
Below is a screenshot of the Google Fonts home page at:
Google Fonts: the three steps
There are three basic steps to using Google Fonts. They are as follows.
- Select your font: From the Google Fonts website you choose the weight(s) and style(s) of the font-family you want to use.
- Copy-and-paste: You copy the HTML code generated by the Google Fonts website into the <head> of every page on which you want to use you chosen font(s).
 In the example above, the name of the font is ‘Merriweather’.
 - Update your CSS file: Edit the font-family style rules in your CSS file with the names of your chosen fonts.
For example, to use the Kinsta font for your <h1> headings, you would edit the h1 selector in your CSS file as follows.
 To use the PT Sans font for your <h3> headings, you would edit the h3 selector in your CSS file as follows.
 And if you wanted to use the Work Sans font for your text paragraphs, you would edit the p selector in your CSS file as follows.
 Note that the font name is always wrapped in a pair of single quotation marks (‘ ’).
You can also see that every Google Font name is followed by a comma (,) and what is called a fallback font – either serif or sans-serif. This is the font that is displayed when the web page is viewed without a live Internet connection.
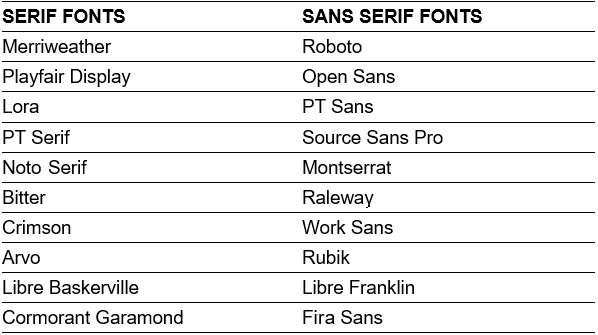
Popular fonts in 2024
As with much else, there are fashions and trends in fonts. Here are the more widely-used serif and sans-serif fonts at the moment.
Adding fonts to section-selector-1
Follow the steps below:
Obtaining the Google Fonts code
Your first task is to go to the Google Fonts website, select the weight/styles of your required font-family, and then copy the related HTML code.
- In your web browser, go to the Google Fonts website at the address below: https://fonts.google.com
- In the Search box at the top of the screen, type the font-family (typeface) name of Work Sans.
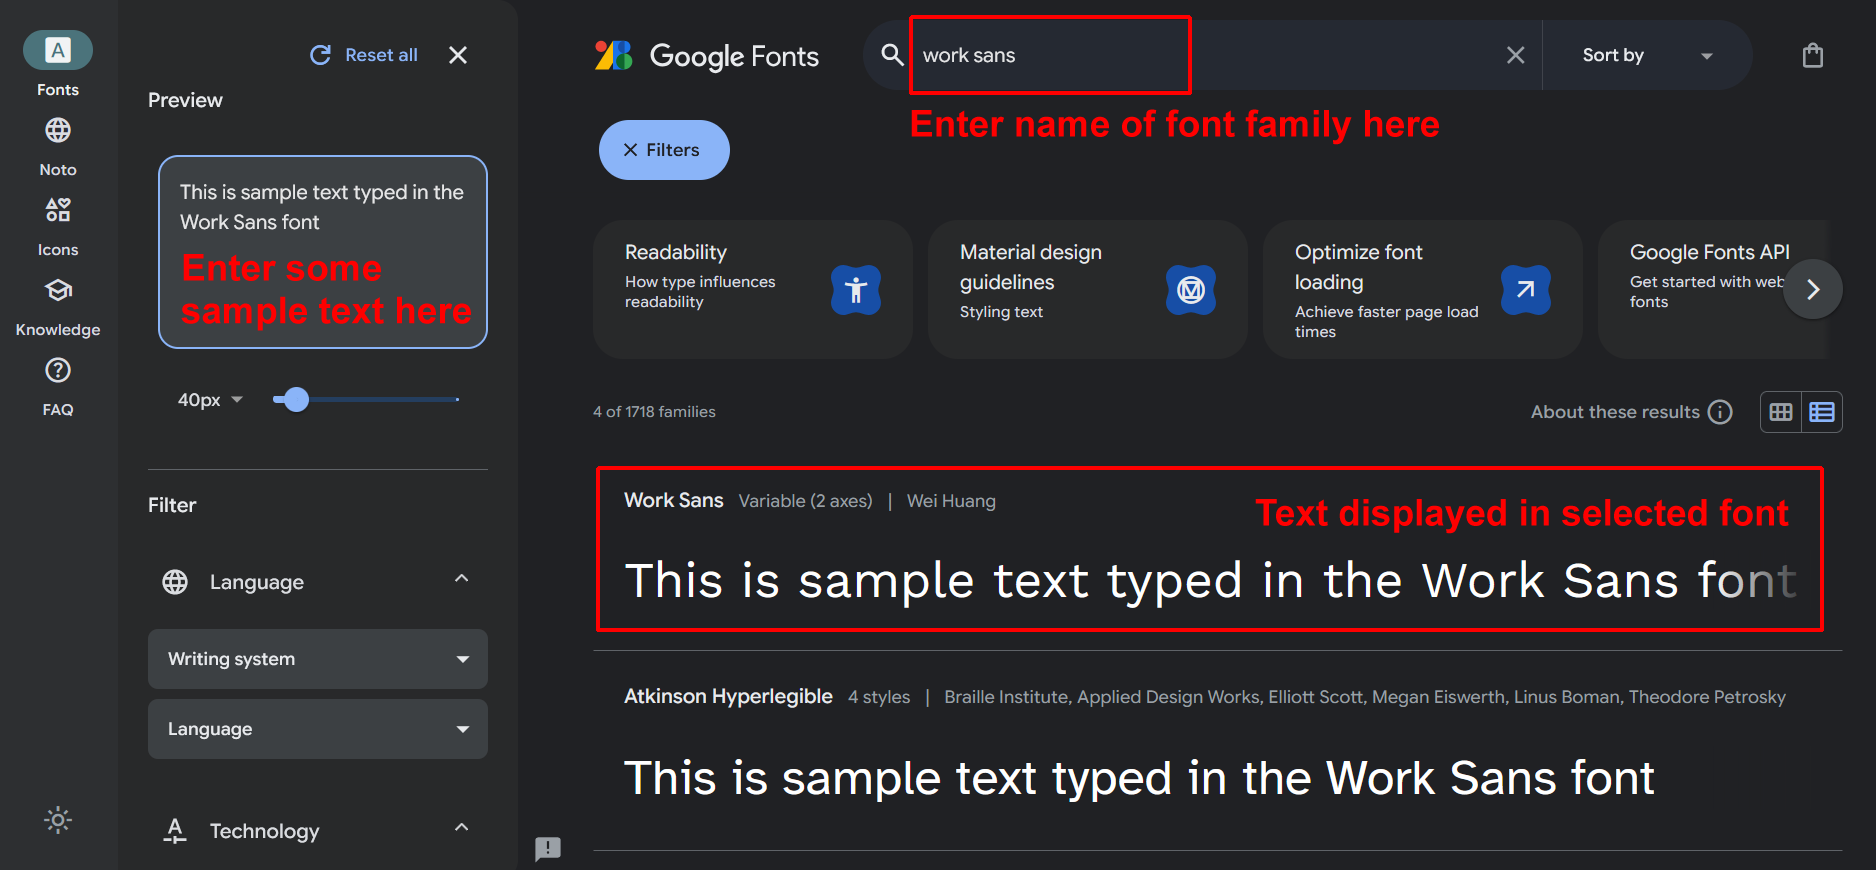 You can type some sample text in the box on the left to see how your selected font-family will look.
 - Next, in the search results displayed in the lower half of the screen, click on Work Sans.

- At the top-right of the next screen, click the Get font button.

- On the next screen, at the top-right you can see an icon indicating you have selected one font family.
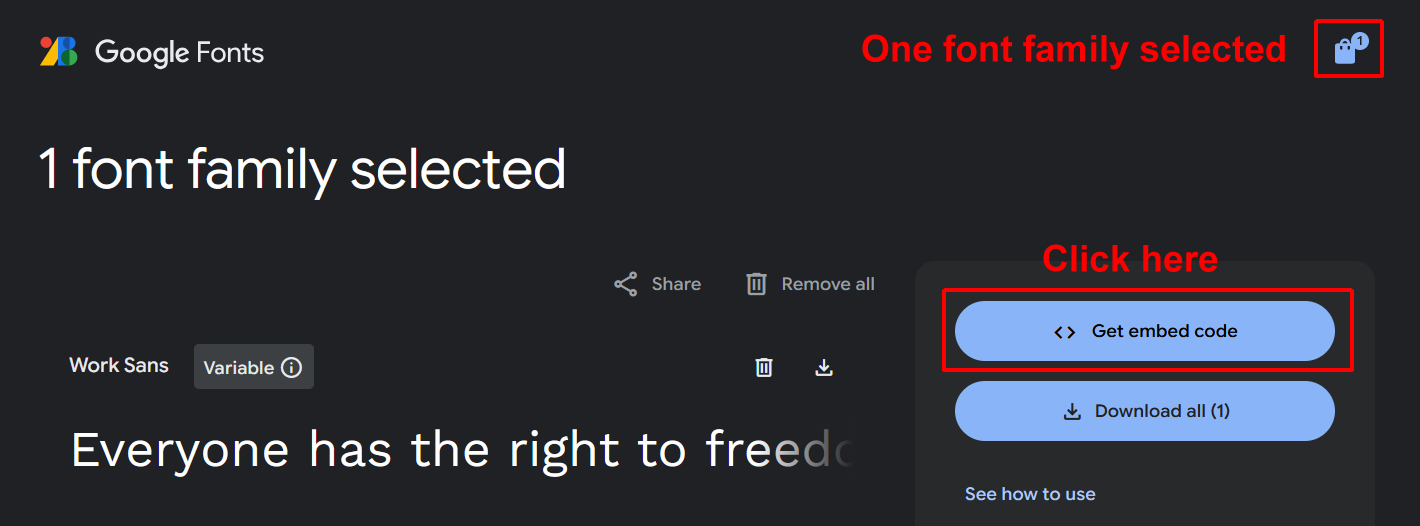 Click the Get embed code button.
 - On the next screen displayed, click the Copy button for the code on the top-right.
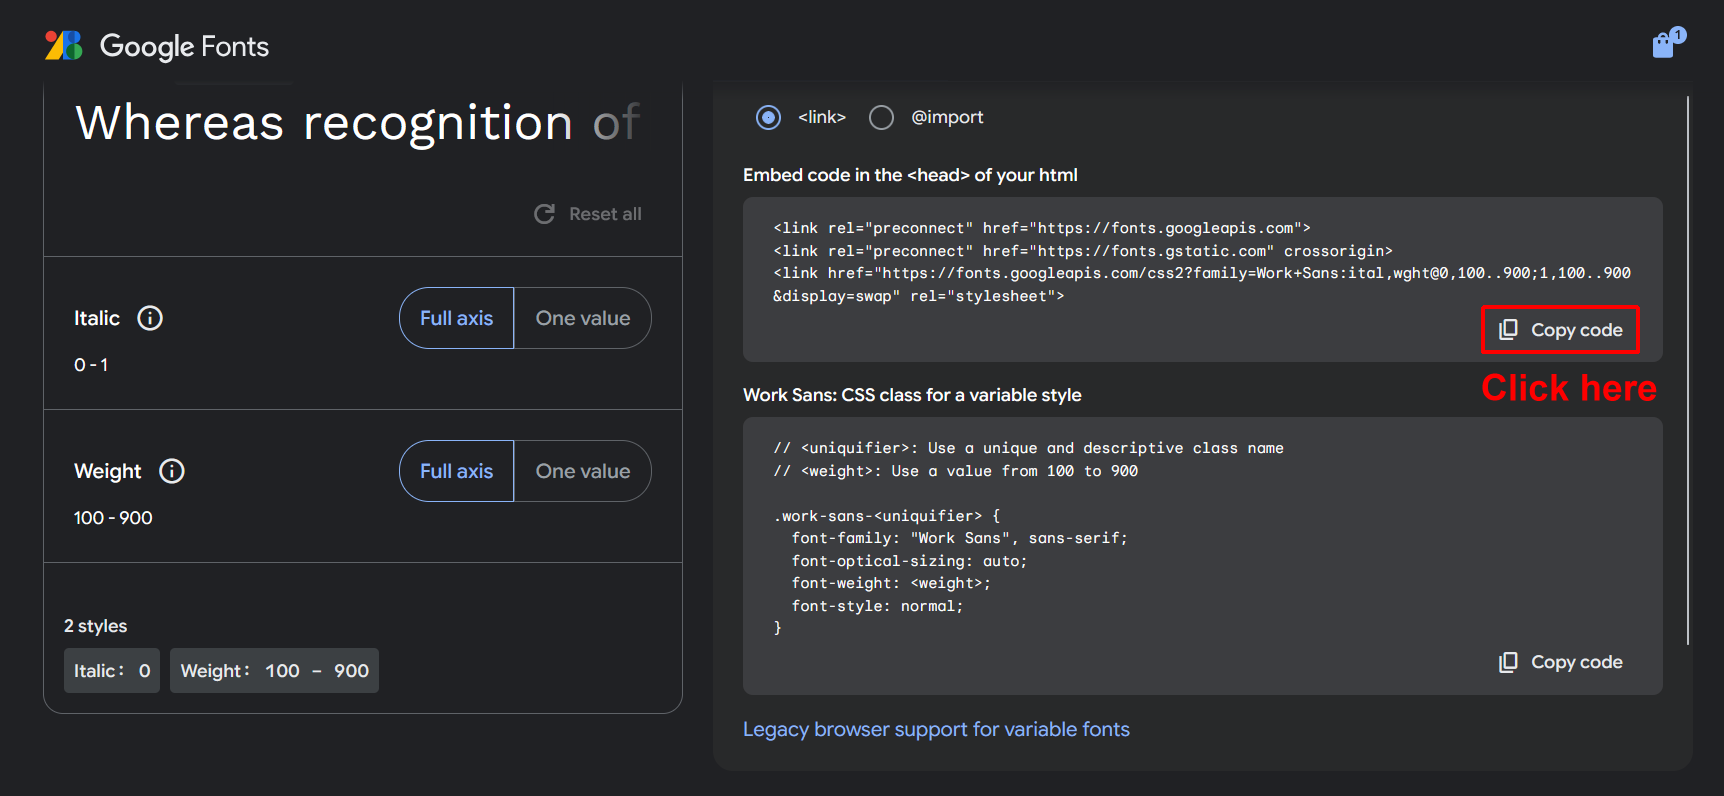
Updating your web page with the Google Fonts code
Next, you will paste the HTML code you copied from Google Fonts into your web page.
- In VS Code, open the page-10.html web page.
- Just before the closing </head> tag, paste in the copied HTML code.
Optionally, add the following comment line just above the pasted Google Fonts code.
<!-- Google Fonts -->Your web page <head> should now look similar to that below.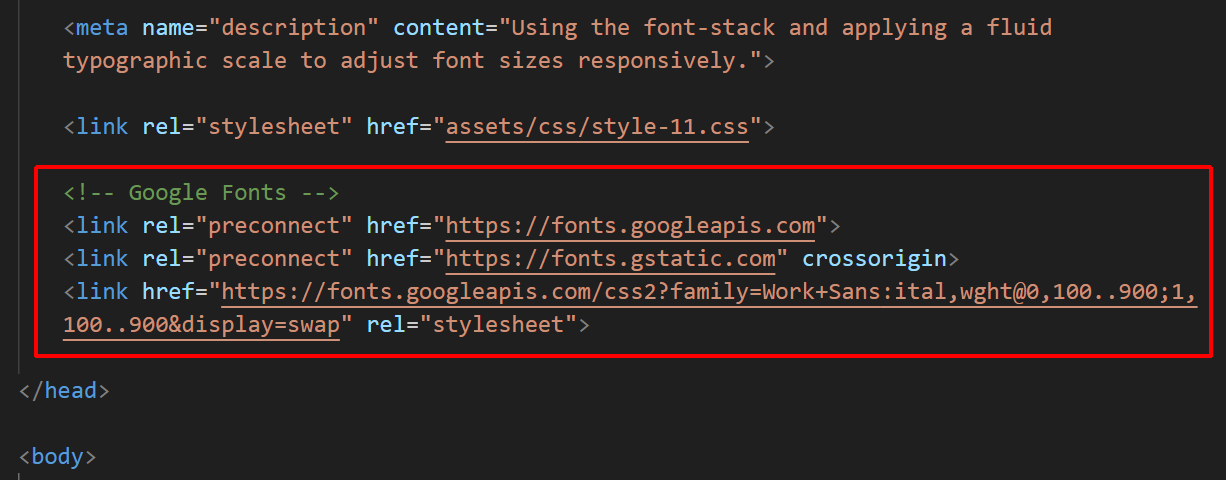
- Save your page-10.html web page.
When you view the page-10.html page in a web browser, you can see nothing has changed. For your selected Google Font to display, you also need to update the style-10.css stylesheet file linked to the web page.
Updating your stylesheet with the font-family name
Your final task is to update the linked stylesheet with the font-family name of the Google Font you want to use in your web page. Here are the steps.
- In VS Code, open the following stylesheet file: style-10.css
- Add the following new style rule for the .section-selector-1 container class as shown below.
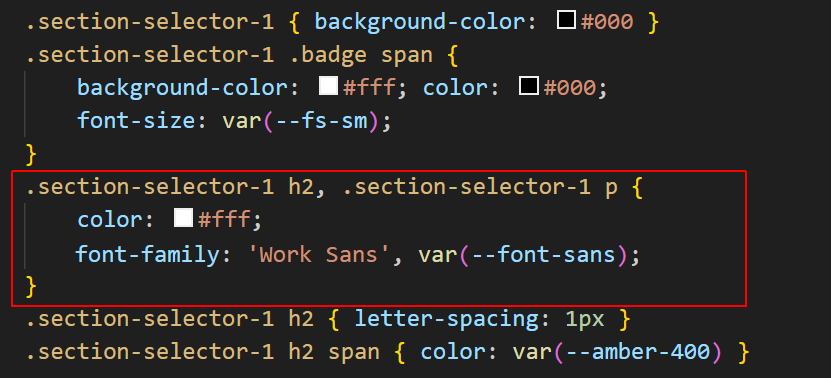
- Save your style-10.css file and view the page-10.html page in your web browser.
✅ Task completed.
Adding fonts to section-selector-2
Follow these steps:
- In the Google Fonts tab of your web browser, click the Fonts option in the menu at the top right.
 This returns you to the Google Fonts home page.
 - In the Search box at the top-left of the screen, type the font-family (typeface) name of Outfit and then click this font-family in the search results.
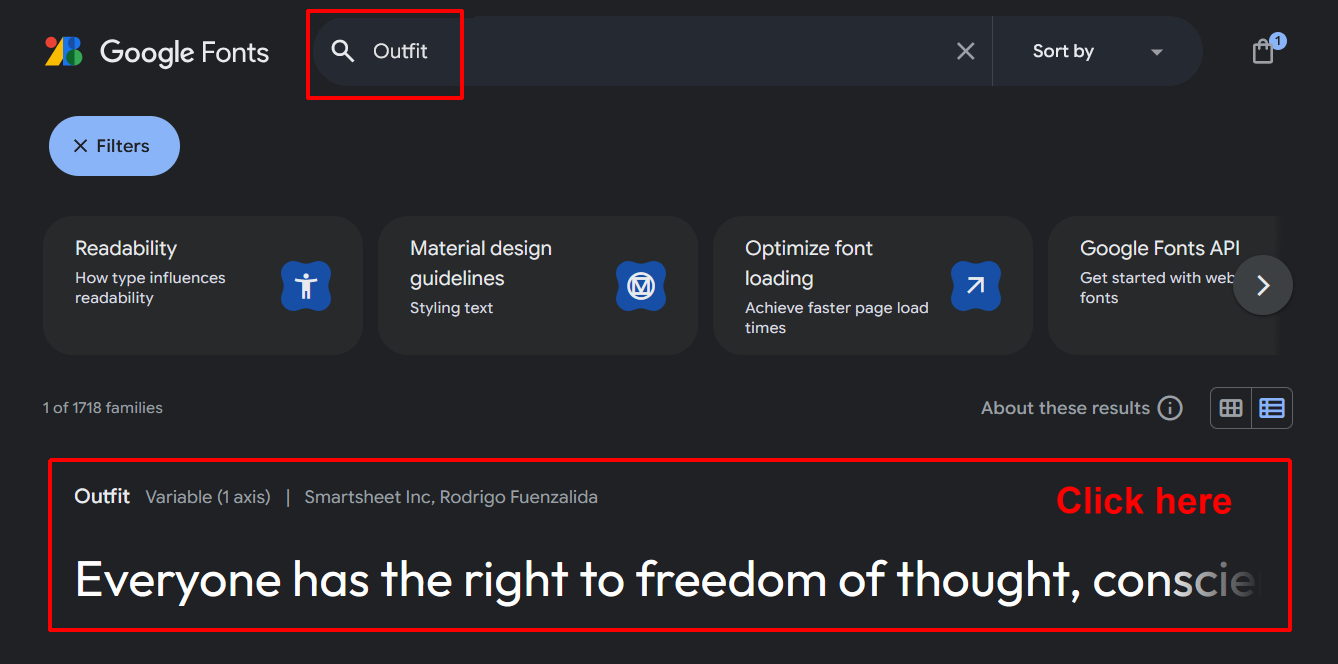 You can delete the sample text from the Preview box.
 - At the top-right of the next screen, click the Get font button.

- On the next screen displayed, Click the Get embed code button.
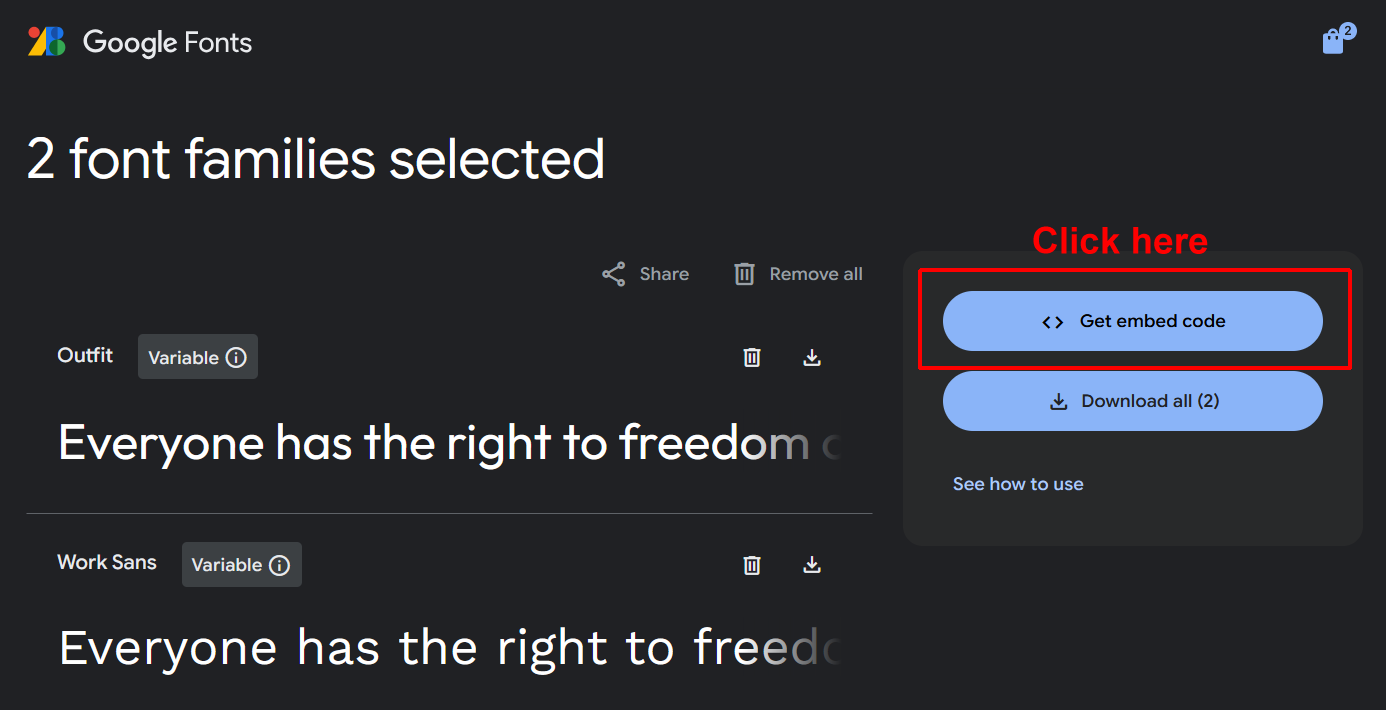
- On the next screen displayed, click the Copy button for the code on the top-right.
- In the <head> of the page-10.html web page, select the existing Google Fonts code, and paste over it.
 You can see that Google Fonts has remembered your previous font selection. Save the page-10.html file.
 - In VS Code, display your style-10.css stylesheet, and add the following new style rule.

- When finished, save the style-10.css file, and view the page-10.html web page in your browser.
✅ Task completed.
Adding fonts to section-selector-3
Follow these steps:
- Click the Fonts option at the top right to return the home page of Google Fonts.
- In the Search box at the top-left of the screen, type the font-family (typeface) name of Inter and then click this font-family in the search results.
- At the top-right of the next screen, click the Get font button.
- On the next screen displayed, Click the Get embed code button.
- On the next screen displayed, click the Copy button for the code on the top-right.
- In the <head> of the page-10.html web page, select the existing Google Fonts code, and paste over it.
 You can see that Google Fonts has remembered your previous font selection. Save the page-10.html file.
 - In VS Code, display your style-10.css stylesheet, and add the following new style rule.

- When finished, save the style-10.css file, and view the page-10.html web page in your browser.
✅ Task completed.
Adding fonts to section-selector-5
Follow these steps:
- Click the Fonts option at the top right to return the home page of Google Fonts.
- In the Search box at the top-left of the screen, type the font-family (typeface) name of Playfair Display and then click this font-family in the search results.
- At the top-right of the next screen, click the Get font button.
- On the next screen displayed, Click the Get embed code button.
- On the next screen displayed, click the Copy button for the code on the top-right.
- In the <head> of the page-10.html web page, select the existing Google Fonts code, and paste over it.
- In VS Code, display your style-10.css stylesheet, and add the following new style rule.

- When finished, save the style-10.css file, and view the page-10.html web page in your browser.
✅ Task completed.
Adding fonts to section-selector-6
For this section, you will use two different Google Fonts: Bebas Neue for the h2 heading and Inter, which you have already selected, for the p paragraph text.
Follow these steps:
- Click the Fonts option at the top right to return the home page of Google Fonts.
- In the Search box at the top-left of the screen, type the font-family (typeface) name of Bebas Neue and then click this font-family in the search results.
- At the top-right of the next screen, click the Get font button.
- On the next screen displayed, Click the Get embed code button.
- On the next screen displayed, click the Copy button for the code on the top-right.
- In the <head> of the page-10.html web page, select the existing Google Fonts code, and paste over it.
- In VS Code, display your style-10.css stylesheet, and add the following new style rule.
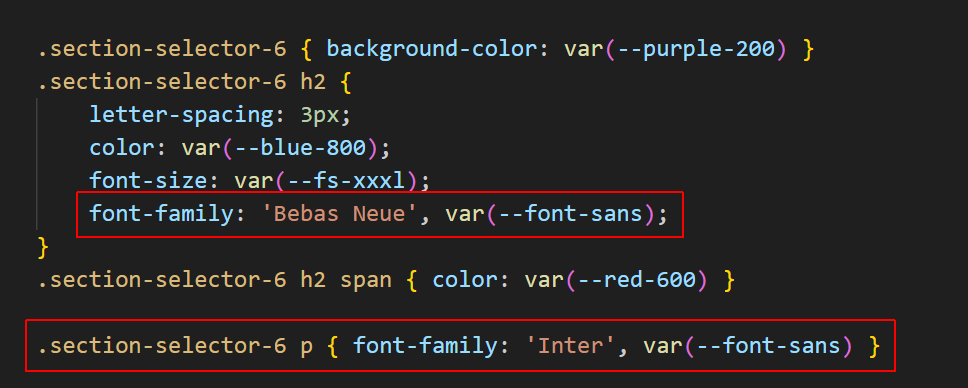
- When finished, save the style-10.css file, and view the page-10.html web page in your browser.
✅ Task completed.
Uploading your files to GitHub
After finishing your web pages and stylesheets, you are now ready to upload them to your account on GitHub.
- Open a new tab in your web browser and go to GitHub.com. If you are not already signed in to your GitHub account, sign in now.

- On your GitHub home page, click the ‘repo’ that holds your web pages. Its name will look as follows, where username is your chosen username on GitHub.
username.github.io

- On the next GitHub screen displayed, near the right of the screen, you can see a button named Add file. Click on it.

- From the dropdown list displayed, choose the option Upload files.

- In File Explorer (Windows) or Finder (Apple Mac), drag-and-drop your index.html file and your 📁 assets and 📁 exercises sub-folders to upload them to your repository on GitHub.

- Scroll down to the bottom of the GitHub screen, and accept or edit the short message (Add files via upload) in the Commit changes box.
- Finally, click the green Commit changes button to upload your files.
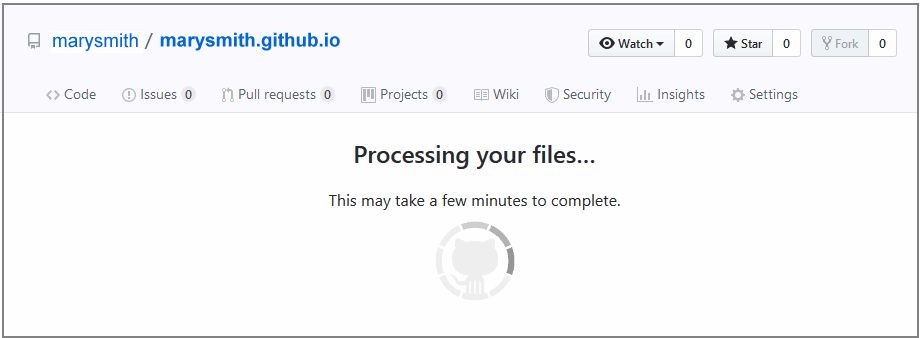
Your updated sample web page is now published on GitHub at a web address similar to the following:
https://username.github.io/exercises/page-10.html
It may take a few minutes for your upload files to appear on GitHub.