Learning Goals
At the end of this Tutorial, you will be able to:
- Create a contollers.js file to store the various router functions for your Express/MongoDB app.
- Refactor the routes.js file so that the routes contain only the router functions names, not the actual function code.
- Export the router functions from the controllers.js file and import them into the router.js file.
About routes and controllers
In this Tutorial, you will refactor the Express routes code to move the route handler functions to a separate controllers file.
Below is shown one such route from the routes.js file of the Express/MongoDB app you created in the previous Tutorial.
As you can see, the route includes the method .get(), the URL path, and, lastly, the JavaScript function that serves the HTML response back to the client.

Your task in this Tutorial is to move the router handler function code out of each route and replace the code with just a function name. See the example below.

The actual code for each router function will be stored in a controllers.js file. See a sample router function below.

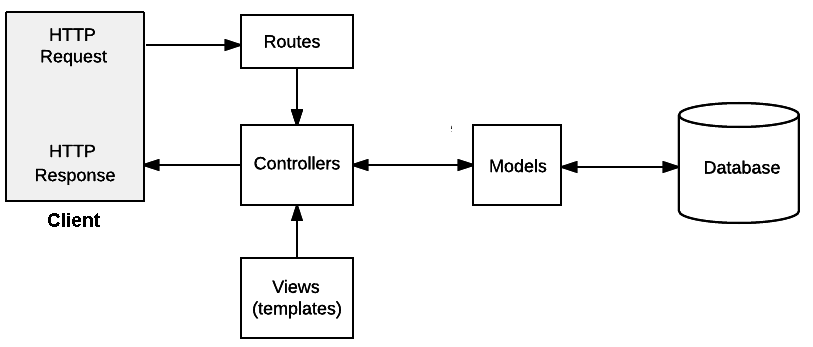
The purpose of this code refactoring is to move your Express/MongoDB app closer to the Model-View-Controller design pattern.

Creating a folder structure
Before continuing, close any Node.js apps that may be running on your machine. Also close any open terminals.
In a previous Tutorials, you created the folder structure shown below for two Express/MongoDB apps.

Copy the /app-mongodb-routes folder and rename it to /app-mongodb-controllers.

Installing the express-async-handler
The route controllers in your app will use the express-async-handler middleware module. So, let's install it as follows:
- Open a Command prompt or VS Code Terminal, and navigate to the folder that holds your app. For example:
cd apps-mongodb/app-mongodb-controllers/server - Install the module locally as follows:
npm i express-async-handler
This will update the package.json file and the node_modules subfolder.
Updating your package.json file
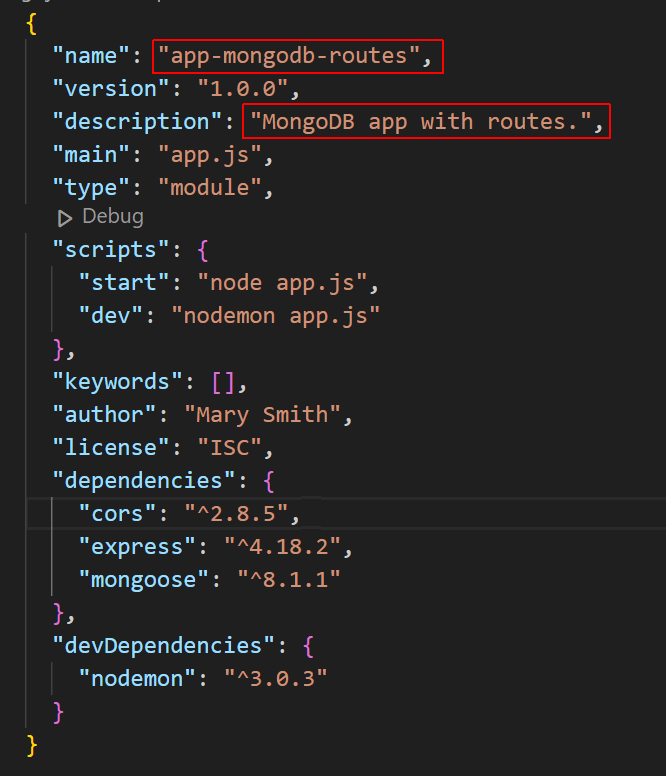
Open your package.json file and update it for your new MongoDB app as shown below.

Downloading your controllers.js file
Your next task is to create a file that will list the controllers for your app.
- In your /server folder, create a subfolder named /controllers.
- Download the controllers.js file to this subfolder.
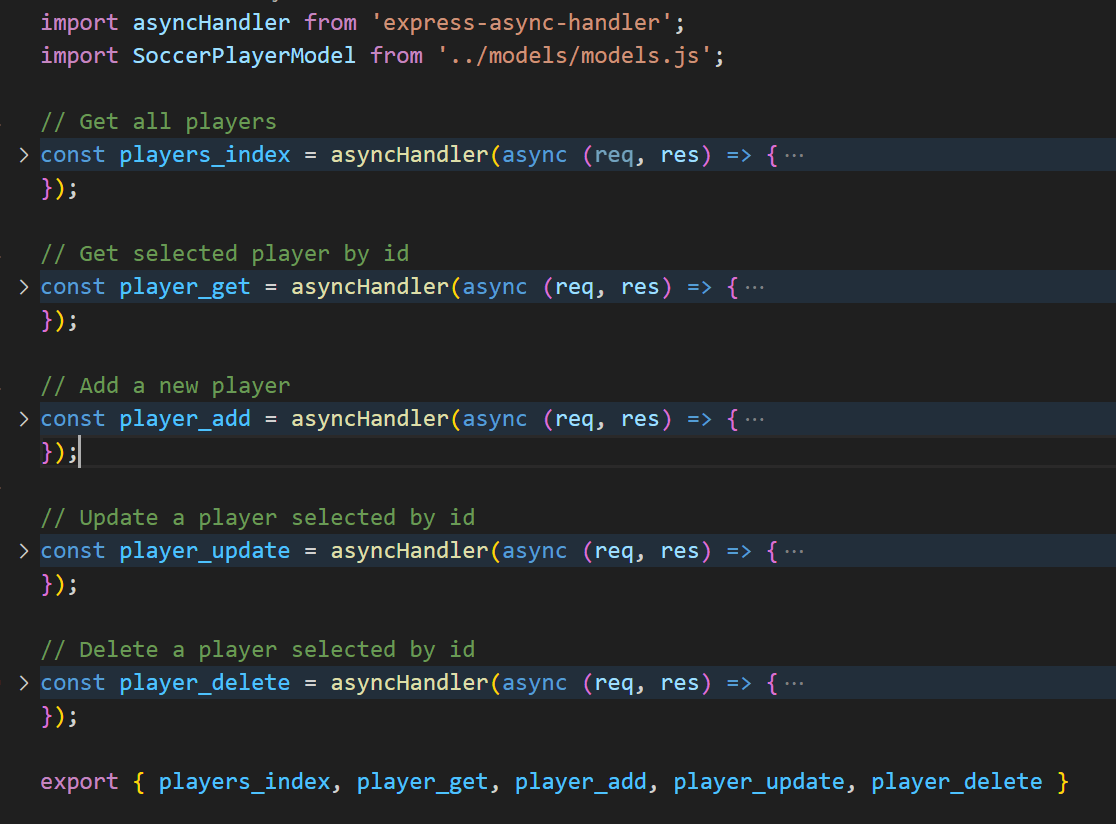
In VS Code, open the controllers.js file. The file begins by importing the asyncHandler module and your models.js file.

In the screenshot above, each of the five controller functions are minimised for reasons of space.
At the end of the file, the five controller functions are exported. These will be imported into your routes.js file.
Refactoring your routes.js file
Your next task is to update your routes.js file.
- Select and copy the code below.
import express from 'express' const router = express.Router(); import { player_add, player_delete, player_get, player_update, players_index } from '../controllers/controllers.js'; // Home page with link router.get('/', async (req, res) => { res.send('index.html'); }); // List all players router.get('/soccer_players/list', players_index); // View selected player by id router.get('/soccer_players/view/:id', player_get); // Add a new player router.post('/soccer_players/add', player_add); // Update a player selected by id router.put('/soccer_players/update/:id', player_update); // Delete a player selected by id router.delete('/soccer_players/delete/:id', player_delete); export default router; - Open your routes.js file, paste in the copied code to overwrite the existing content, and save the file.
You do not need to update your main app.js file.
Running and testing your app
To verify your new controllers and updated routes are working correctly, follow these steps:
- In your terminal, start your Express/MongoDB app:
npm run devYour terminal window should look as follows:
- In Windows Explorer or Finder, go to your /views subfolder and then open the index.html in a web browser.

- On the Home screen, click the List all soccer players link.

- From this and linked web pages, perform some CRUD operations to verify that your updated backend code works correctly.