Learning Goals
At the end of this Tutorial, you will be able to:
- Use the array.map() method with the key string attribute to display data in ReactJS in list and table formats.
Working with arrays of objects
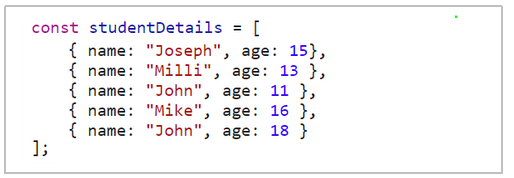
Very commonly in ReactJS you will be working with arrays of objects. See an example below.

In ReactJS, the array.map() method is the standard way of iterating (looping) through arrays. For array of objects named items, you could iterate through each individual object as follows:
<ul>
  { items.map((item, index) => (
     <li key={index}> {item.name} {item.age}</li>
  ))}
</ul>
The key is the second argument of the map() function. It is not displayed on screen - but internally ReactJS requires the key for the loop to work. If you remove the key, the data will still display in your web browser. But you will see the following error in the DevTools console.

The key is a string attribute that helps ReactJS optimize its rendering process.
The index represents the current index of the array being processed. It's not a property of an item object. You could display the key in the browser as follows:
<ul>
  { items.map((item, index) => (
    // Displaying both index position and item properties.
     <li key={index}> {index+1} {item.name} {item.age}</li>
  ))}
</ul>Note: the index is not a good choice for a key value. The index of an item in an array may change over time. Also, you may want to work with copies of an array that includes only some of the original items. In such cases, the index of an item in the copied array will be different to its index in the original array.
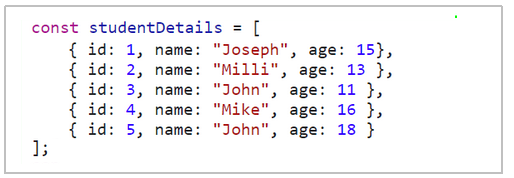
For ReactJS to be able to select, filter, sort, update, create and delete data items, it is best to use data structures where individual data items each have unique IDs. See below.

Scaffolding with Vite
Follow these steps to scaffold your app structure with Vite.
- In a terminal, navigate to where you want Vite to create a folder for your app. For example:
C:\> react-stuff\apps
- Enter the following command that includes the name you want to call your new app. For example, app-react-array-data:
npm create-vite@latest app-react-array-data --template react
- Follow the on-screen instructions to build and launch your new app.

Customising your app content
Next, customise the 'boilerplate' content provided by Vite.
- Download the following file and save it to your app's /src folder. F1.css
- Open index.html in your main app folder and replace the <title> tag content as shown below.

- In your /src folder, open main.jsx and delete the stylesheet link.

- Also in your /src folder, open App.jsx and replace all its content with the content below.
import './F1.css' function App() { return ( <> <h1>Hello, World!</h1> <p>Paragraph of text.</p> </> ); } export default App;
In a browser your app‛s default web page should now look as shown below.

Downloading the app components
Create a /pages sub-folder in your /src folder. Then download the following files and save them to this sub-folder.
ListDrivers.jsx
TableDrivers.jsx
Create a /data sub-folder in your /src folder. Then download the following file and save it to this sub-folder.
Updating your app.jsx file
Update app.jsx with these components as follows.
import ListDrivers from './pages/ListDrivers';
import TableDrivers from './pages/TableDrivers';
import './F1.css'
function App() {
return (
<>
<ListDrivers />
<TableDrivers />
</>
);
}
export default App;Updating your ListDrivers.jsx component
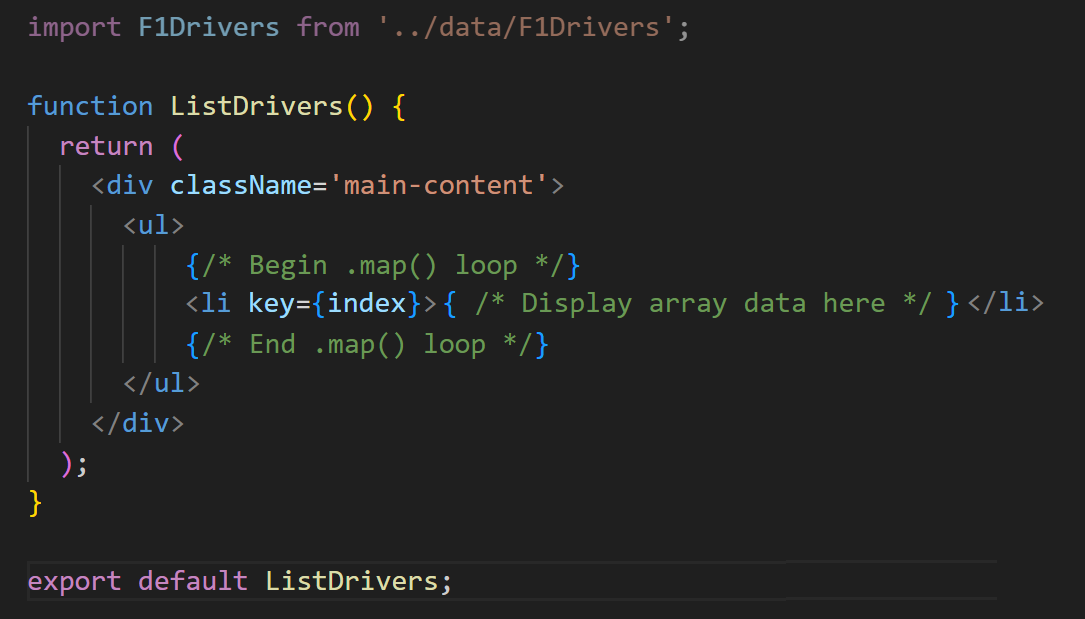
Use the array.map() method with the key attribute to display the F1 drivers in the format of a bulleted list.

For an array named items with name and age property names, the general syntax would be as follows:
<ul>
    { items.map((item, index) => (
       {/* Displaying both index position and item properties. */}
       <li key={index}> {index+1} {item.name} {item.age}</li>
    ))}
</ul>
Adding some styling to the list
Enclose the driver first and last names inside an HTML bold <b></b> tag pair.

Add a hyphen - character and two comma , characters as shown below.

Add two non-breaking space characters before the first name as shown below.

And in the F1.css file, add the following line at the end to remove the bullet character.

Your web browser output from this component should now look similar to that below.

Updating your TableDrivers.jsx component
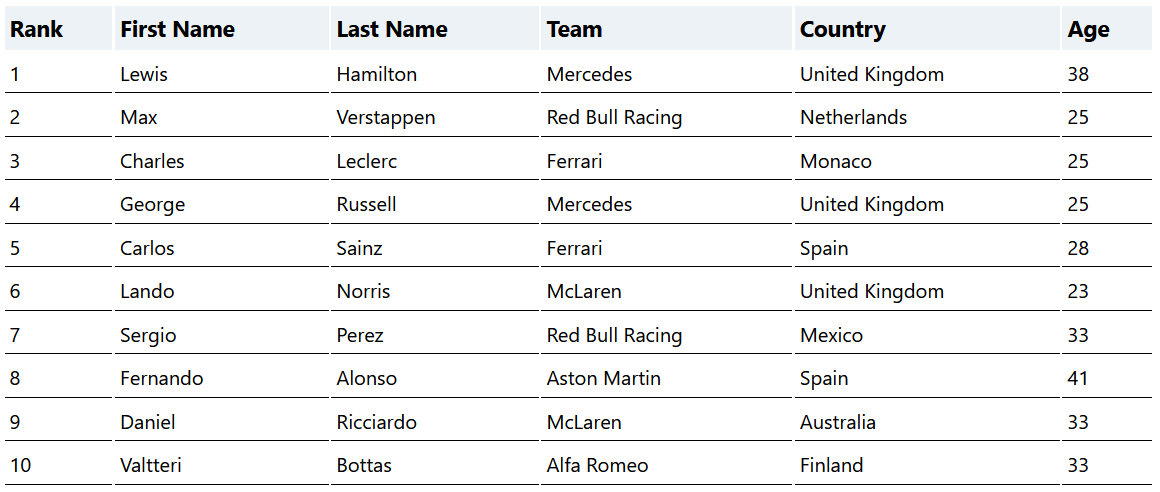
Use the array.map() method with the key attribute to display the F1 drivers in table format.

For an array named items with name and age property names, the general syntax would be as follows:
<tbody>
    {items.map((item, index) => (
      <tr key={index}>
         <td>{index+1}</td>
         <td>{item.name}</td>
         <td>{item.age}</td>
      </tr>
    ))}
 </tbody>
The web browser output from this component should look similar to that below.

Re-write your app as a single page app with a Home Page, an error page, and pages for the list and table views.
Download these two files to display on every page of your SPA, and use the <Link /;> component to provide page navigation:
When finished, deploy your app to GitHub and GitHub Pages.