
Learning Goals
At the end of this Tutorial, you will be able to:
- With VS Code, use File| New File to create a blank web page and File | Save As to base a new web page on an existing one.
- Add and customise standard <head> content for a web page.
- Add text content to a web page by copying-and-pasting from a document and from the source code of another web page.
- Generate placeholder lorem ipsum text.
- Mark-up text with heading, paragraph, bold and italics HTML tags.
- Add non-displaying HTML comments to a web page.
- Hide a web page from Google and other search engines.
- Create hyperlinks between web pages.
- Upload web pages to your GitHub account.
You can view finished versions of the five sample web pages you will create in this Tutorial by clicking the links below. The finished samples will each open in a new tab of your web browser.
Creating your folder structure
Before making any web pages, it’s a good idea to create a location on your computer to store them.
Working with web pages is very different to working with Microsoft Word or Adobe Photoshop. With those apps, you are typically working with only a single file at any one time.
In contrast, web pages can contain lots of files. There is the web page itself (an HTML file), one or more stylesheets (CSS files), several images (JPG or PNG files) and maybe some JavaScript code (JS files) and videos (MP4 files) as well.
That’s a lot of files to keep track of!
Moreover, any one website will commonly contain multiple web pages, and each of these will have its own list of images and other files.
Creating your ‘main’ folder
Your first step is to create a 📁 folder on your computer to store all your web design work – all your files and sub-folders. You can think of this as your “main” or “high-level” folder.
For Microsoft Windows 10 users, here are the steps:
- Open File Explorer.
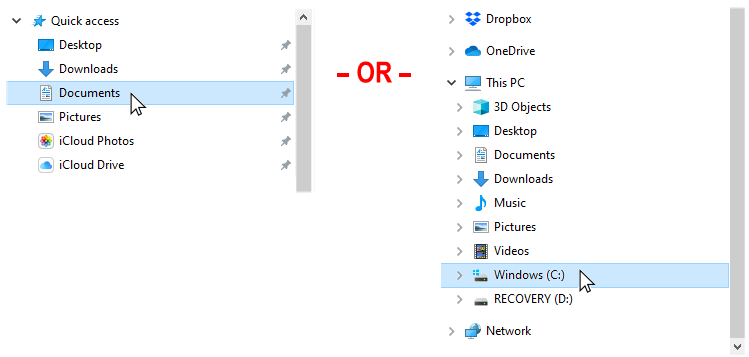
- In the left-hand column, click either on Documents or your C: drive.
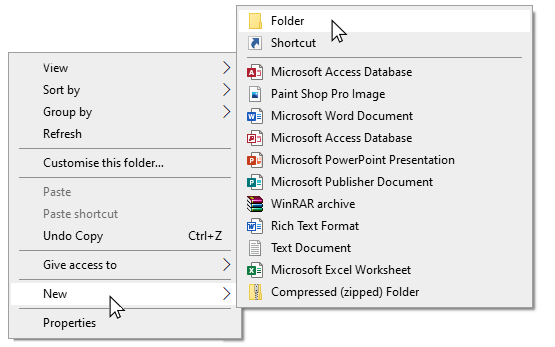
- On the next screen displayed, in the blank space at the right side, right-click and choose New | New folder from the context menu.
- Give your new folder a name. For example, websites.


DO NOT type upper-case letters. Type websites.
DO NOT type 'Websites' or 'WEBSITES'.
DO NOT type blank spaces such as 'web sites'.
✅ That’s it. In future, you will never need to wonder where your web-related files are located on your computer – they will always be in your 📁 websites folder.
Creating your ‘exercises’ sub-folder
Creating your ‘main’ 📁 websites folder is only a first step. You will be working with many dozens of files in this course. To keep your files organised, you will be creating a number of sub-folders. And many of these will, in turn, contain sub-folders of their own.
Follow these steps to create a sub-folder to store the exercise files you will work with in this and the next few Tutorials.
- In Windows 10, open File Explorer.
- Select and display your 📁 websites folder.
- In the blank space at the right side, right-click and choose New | New folder from the context menu.
- Give your new sub-folder this name:
exercises
DO NOT type upper-case letters. Type exercises.
DO NOT type 'Exercises' or 'EXERCISES'.
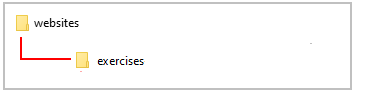
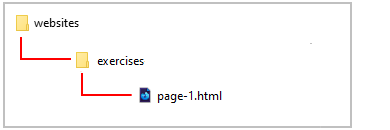
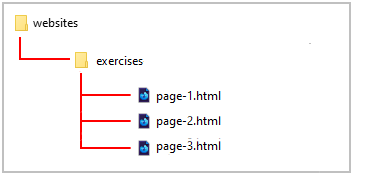
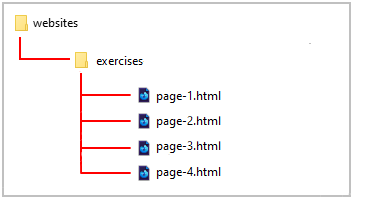
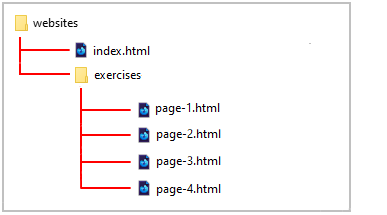
✅ All done. Your folder and sub-folder structure should now look as shown below.
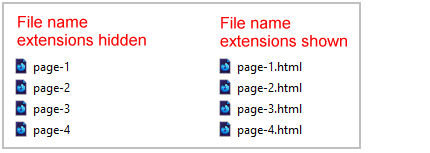
Viewing the full names of files
You will find it easier to work with the various types of files you will meet in web design when you can see the full name of each file.
By default, the Finder on Apple Macs shows the name of every file in full.
Microsoft Windows, however, hides the second part of file names, known as the file name extension.
Follow the steps below to view file name extensions in Windows 10.
- Open File Explorer, and select and display your 📁 websites folder.
- In the menu at the top of the screen, click the View option.
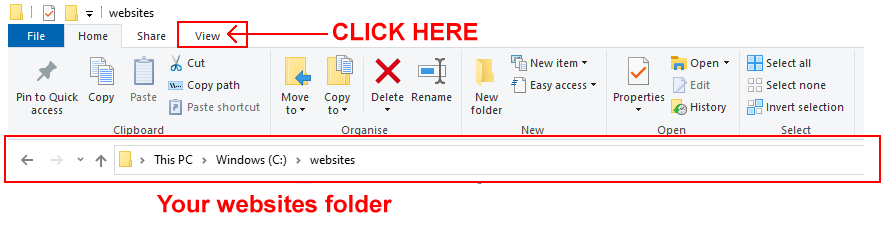
- You are now shown a new ribbon of options. Check the box named File name extensions.

✅ For all files in your 📁 websites folder and its sub-folders, you will in future be shown the full file name that includes the file name extension.
Pinning File Explorer to your Windows Taskbar
If you are using Windows 10, you can add File Explorer to the Taskbar along the bottom of your Windows desktop. You can then launch it at any time with a single click.
Follow these steps:
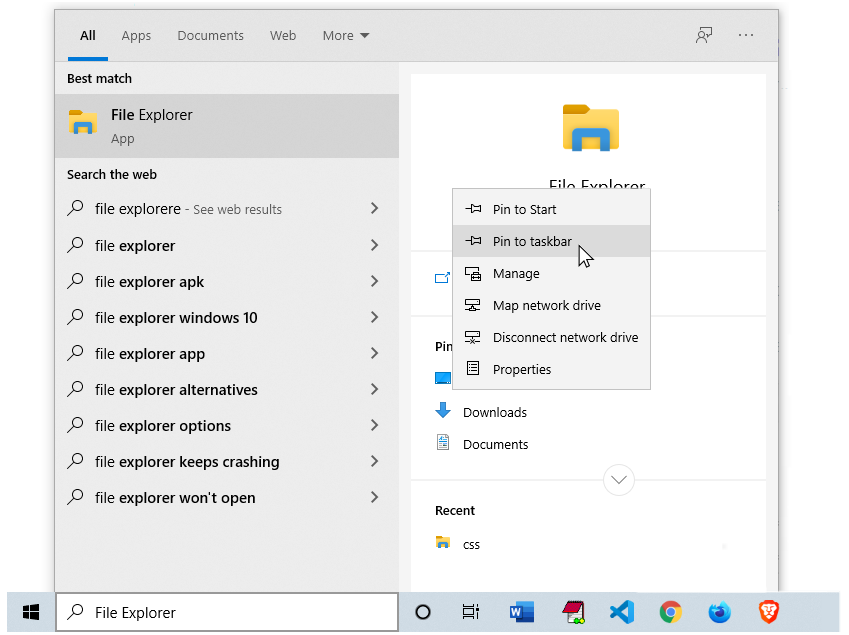
- In the Search Box at the left of the Taskbar, enter "File Explorer" (without quotes).

- When the File Explorer icon is displayed in the list of search results, right-click on it.
- Choose Pin to taskbar from the list of options displayed.
In future, when you need to launch File Explorer, you can simply click its icon on the Taskbar.

✅ Another task completed. You are now ready to create your first web pages.
Creating your first web page
You are now ready to create a new web page – that is, an HTML file. Here are the steps:
- Start Microsoft Visual Code (VS Code) on your computer.

- Choose the File | New File command.
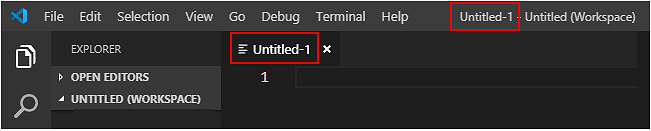
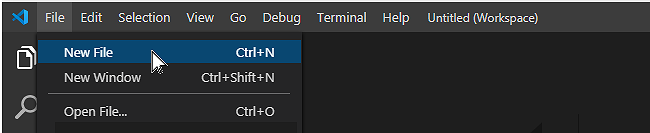 VS Code creates a new, empty file in a new tab within your VS Code window.
It suggests the name of Untitled-1 for your new file.
VS Code creates a new, empty file in a new tab within your VS Code window.
It suggests the name of Untitled-1 for your new file.
 Let’s give your file a new name and save it as an HTML file.
 - Choose the File | Save As... command.
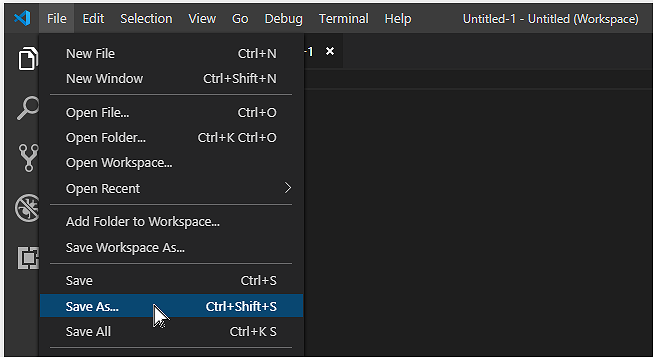
- In the dialog box now displayed, save your file in the 📁 exercises sub-folder of your 📁 websites folder with this name:
page-1.html
DO NOT name your web page with an upper-case ‘P’ as in Page-1.html.
And DO NOT use some other combination of upper and lower-case letters, such as PAGE-1.HTML or page-1.HTML.
Also, DO NOT enter any blank spaces in the name of your file: type page-1.html NOT page - 1.html or page -1.html.
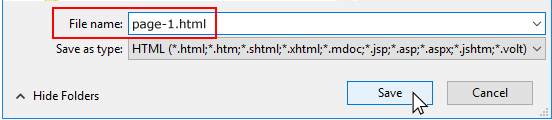 Because you have included the file name extension (.html), you can ignore the second box named Save as type.
After typing the name of your file, click the Save button.
Notice how VS Code now displays the name of your page-1.html file at the top of the screen.
Because you have included the file name extension (.html), you can ignore the second box named Save as type.
After typing the name of your file, click the Save button.
Notice how VS Code now displays the name of your page-1.html file at the top of the screen.
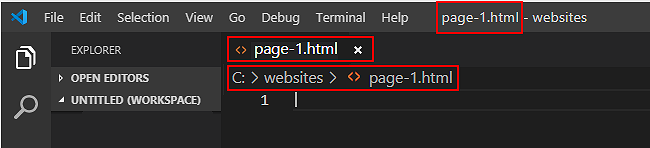
✅ That’s it. You have successfully created your first sample web page.
Your folder and file structure should look as shown below.
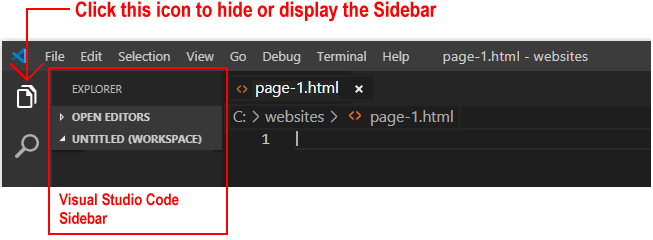
Hiding/displaying the VS Code Sidebar
By default, Visual Studio Code displays a Sidebar at the left of the screen. You can click the icon near the top-left of the screen to hide or display this Sidebar.
Adding the <head> and <body> structure
After creating and naming your new, empty page-1.html web page, your next task is to add the basic <head> and <body> structure to it.
Visual Studio Code offers a convenient shortcut for doing this.
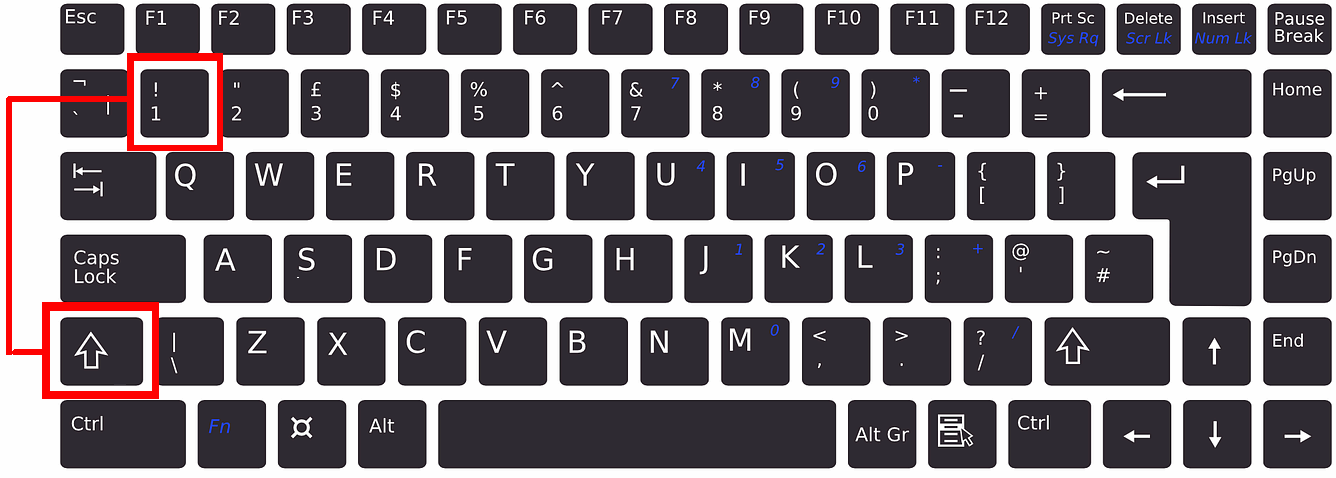
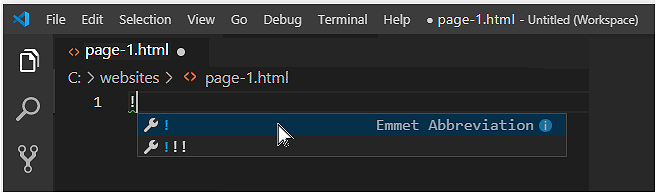
- In VS Code, click anywhere in your empty web page and type the exclamation mark ! (SHIFT key and 1 key).
 After one or a few seconds, the Emmet Abbreviation menu appears. Click on the first option from the menu. Or press the ENTER key.
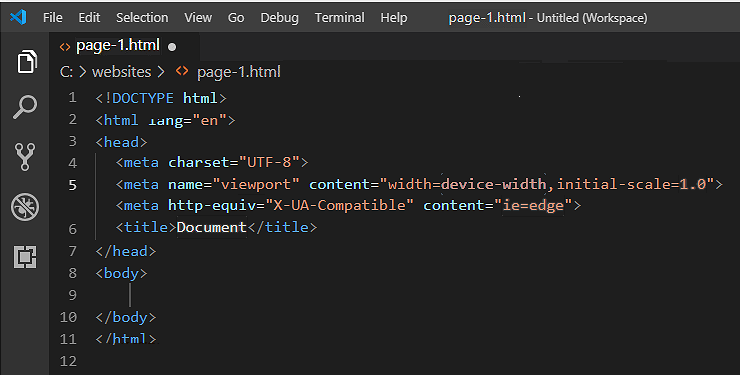
 VS Code now fills your new file with the basic HTML structure.
 NOTE: The exclamation mark ! shortcut key is part of Emmet, a collection time-saving tools for web designers and developers that is pre-installed in VS Code.
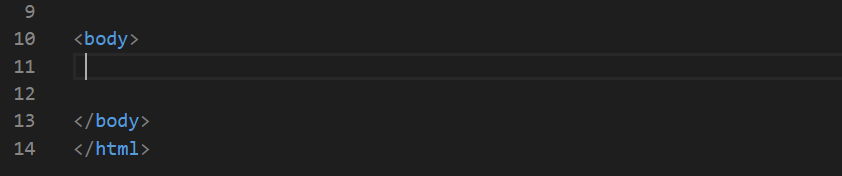
 - To make your web page easier to read and edit, add some blank lines after the closing </head> tag and before the opening <body> tag.
Click just before the <body> tag and press the ENTER key one, two or three times.
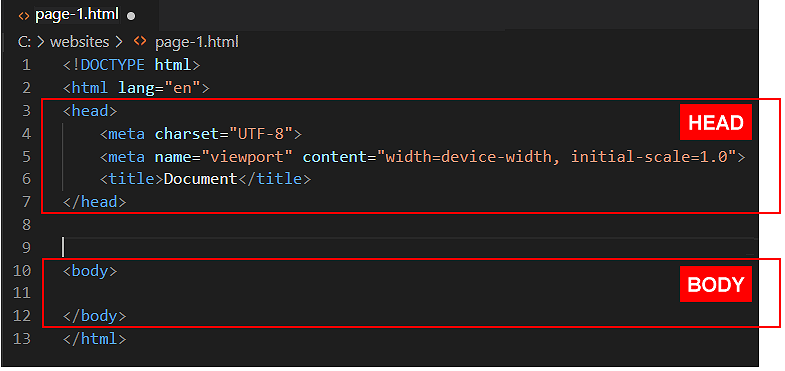
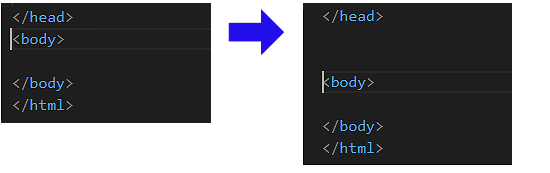 When you look at the HTML of your web page on the VS Code screen, you can now see visually ‘at a glance‘ where the <head> ends and the <body> begins.
- Save your HTML file. You can choose the File | Save command from the menu. Or simply press Ctrl key (Windows) or Command ⌘ key (Apple) and press the s (for Save) key.
✅ Well done. You have now created what is called a ‘valid’ web page.
Adding a title to the <head> of your web page
Now you will give a title to your web page.
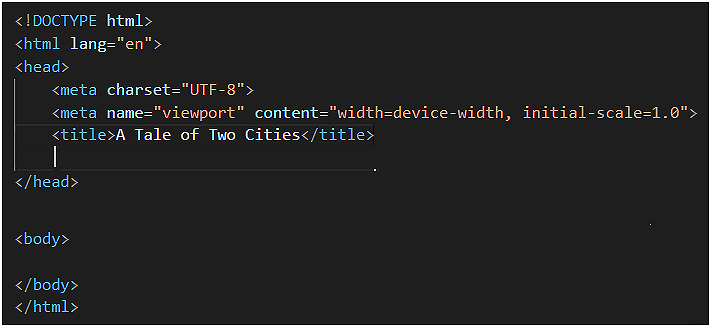
- In the <head> of your page-1.html file, you can see that VS Code has given your page a default title of Document.
This text is located between the opening <title> and closing </title> tags.
<title>Document</title>
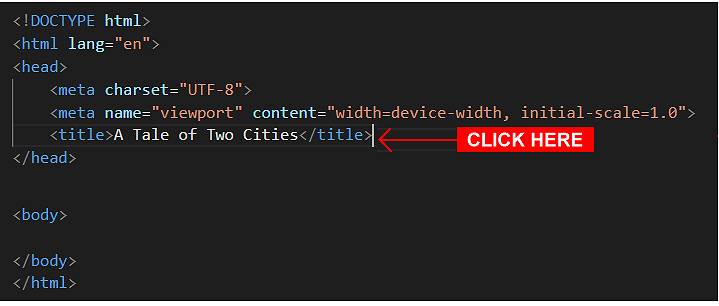
- Replace this with the following new text:
<title>A Tale of Two Cities</title>
- When finished, save your HTML file.
Adding a description to the <head> of your web page
Now you will add a summary description of the contents of your web page.
- In the <head> of your web page, at the end of the line that contains the <title> ... </title> tag pair, click with the mouse and then press the Enter key to open a new, blank line.
 Your web page should now look as shown below.
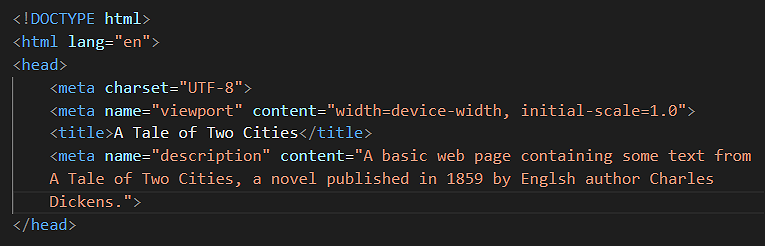
- Copy the following line:
<meta name="description" content="A basic web page containing some text from A Tale of Two Cities, a novel published in 1859 by English author Charles Dickens.">
- Paste the copied text in your web page, on the new, blank line you created under the <title> ... </title> tag pair.
See below.
- Save your page-1.html file.
✅ You are now finished working with the <head> of your first sample web page.
Displaying your web page
Let’s display your page-1.html web page in a web browser.
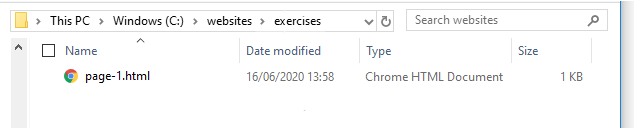
- Open File Explorer (Windows 10) or Finder (Apple Mac), and display the contents of your 📁 websites/exercises sub-folder.
Your choice of default web browser determines which icon is shown for your HTML files.
- If you have set Google Chrome as your default web browser, your screen should look as shown below.
- If you have set Mozilla Firefox Developer Edition as your default web browser, your screen shown look as below.

- If you have set Google Chrome as your default web browser, your screen should look as shown below.
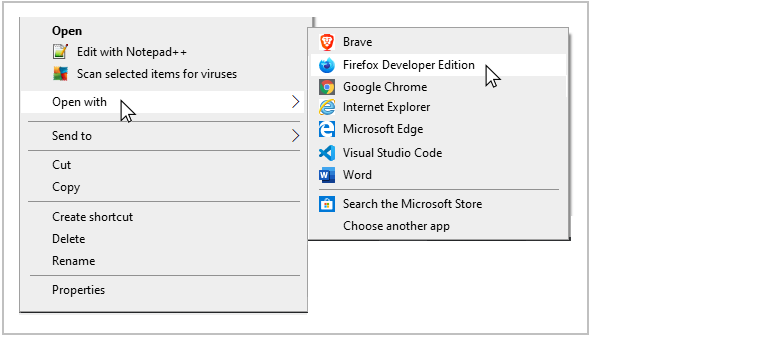
- If some other web browser is your default:
- Right-click the page-1.html file.
- From the context menu displayed, choose Open with.
- Select either Firefox Developer Edition or Google Chrome to open the web page.
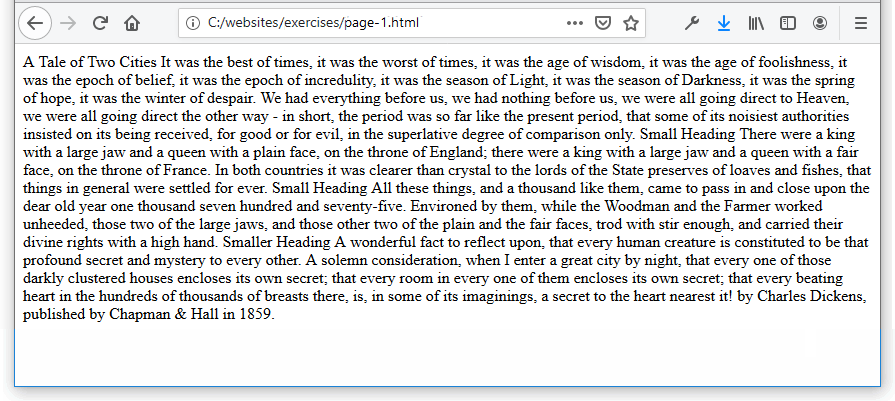
- Your web page should look as shown below.
 Note the address of your web page in the Address Bar of your web browser.
- The first part of the address shows the name of the folder and sub-folder (websites/exercises) that contains your web page.
- The second part of the address shows the name of the file (page-1.html).
- Because you have not yet added any content to the <body> of your web page, it looks as if it is empty.
However, your web page does contain the correct content within its <head>.
To view this:
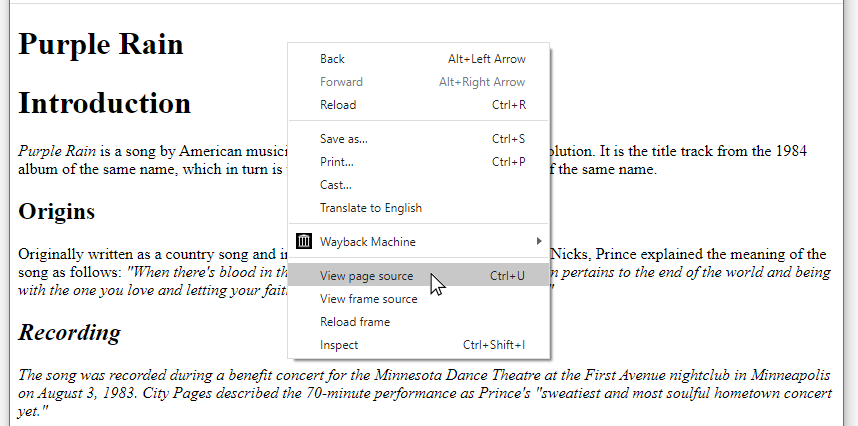
- Right-click anywhere on the web page.
- From the context menu displayed, choose the View page source command.
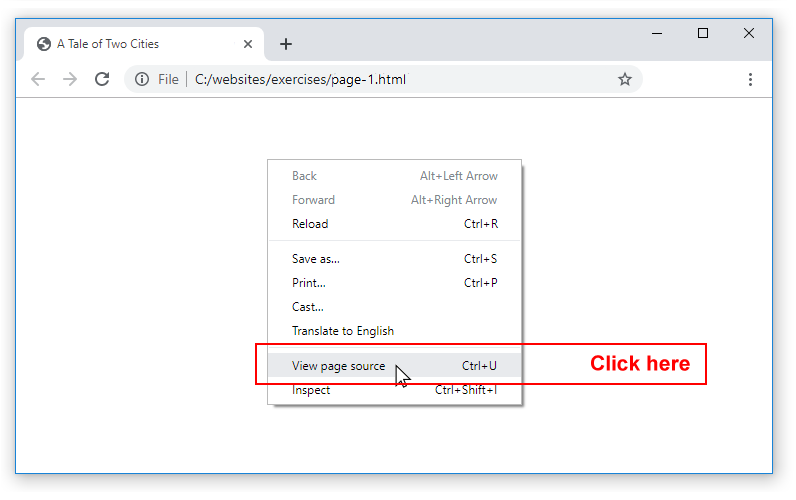
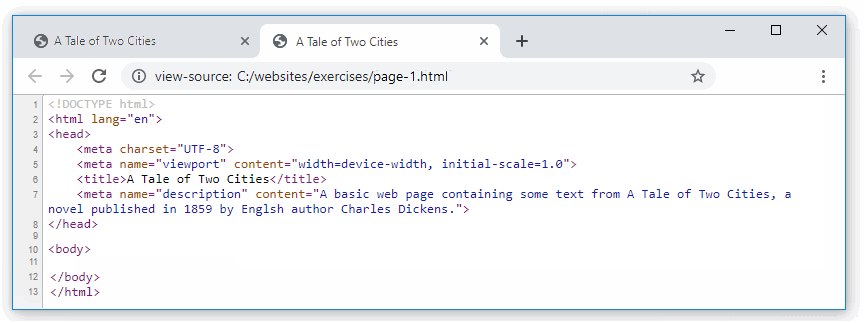
- Your web browser opens a new tab and displays the HTML source code of your web page.
Adding text to the <body> of your web page
In this section, you will copy-and-paste some text content to the <body> of your web page.
- Drag down and across all the text in the grey box below to select it.
A Tale of Two Cities
It was the best of times, it was the worst of times, it was the age of wisdom, it was the age of foolishness, it was the epoch of belief, it was the epoch of incredulity, it was the season of Light, it was the season of Darkness, it was the spring of hope, it was the winter of despair.
We had everything before us, we had nothing before us, we were all going direct to Heaven, we were all going direct the other way - in short, the period was so far like the present period, that some of its noisiest authorities insisted on its being received, for good or for evil, in the superlative degree of comparison only.
Small Heading
There were a king with a large jaw and a queen with a plain face, on the throne of England; there were a king with a large jaw and a queen with a fair face, on the throne of France. In both countries it was clearer than crystal to the lords of the State preserves of loaves and fishes, that things in general were settled for ever.Small Heading
All these things, and a thousand like them, came to pass in and close upon the dear old year one thousand seven hundred and seventy-five. Environed by them, while the Woodman and the Farmer worked unheeded, those two of the large jaws, and those other two of the plain and the fair faces, trod with stir enough, and carried their divine rights with a high hand.Smaller Heading
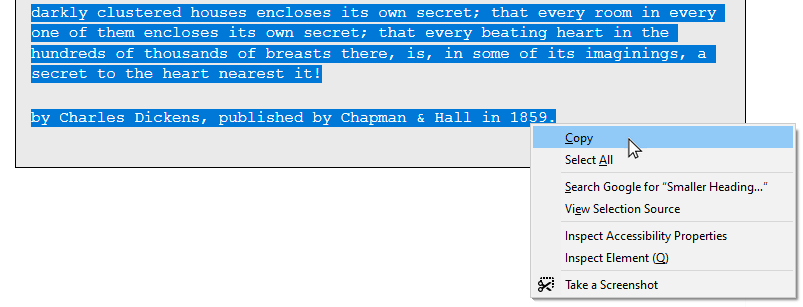
A wonderful fact to reflect upon, that every human creature is constituted to be that profound secret and mystery to every other. A solemn consideration, when I enter a great city by night, that every one of those darkly clustered houses encloses its own secret; that every room in every one of them encloses its own secret; that every beating heart in the hundreds of thousands of breasts there, is, in some of its imaginings, a secret to the heart nearest it!by Charles Dickens, published by Chapman & Hall in 1859.
- Right-click on the selected text and, from the context menu, choose Copy.
- In VS Code, with the page-1.html file open, click on the first blank line after the opening <body> tag.
 Now, paste the copied text.
 - VS Code may add one or more blank lines after the opening <body> tag and before the pasted text. You can delete these blank lines.
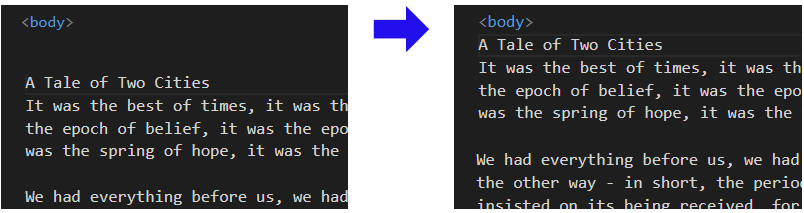
- Save your file and then display it in your web browser.
As you can see, the web browser ignores any paragraph breaks in the file and displays all the text content as a single block.
This is because the content is not marked up with HTML tags.
Marking up the content in your first web page
Now you will mark-up the text of your web page with opening and closing pairs of the following HTML tags: <h1>, <h2>, <h3> and <p>.
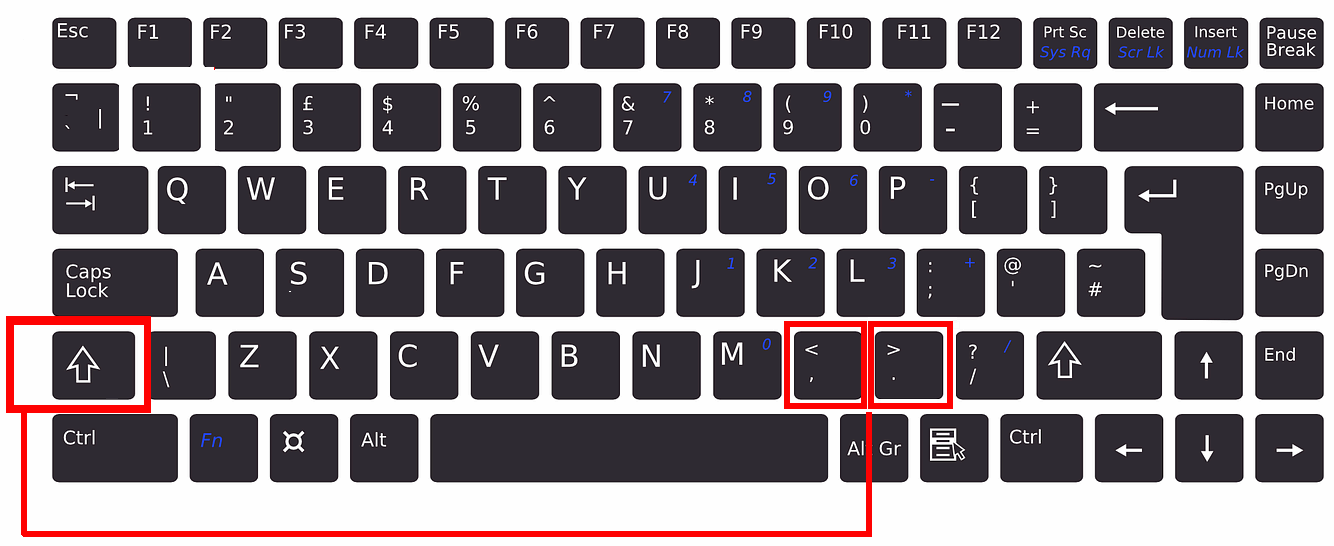
The < symbol is known as the left angle bracket. And the > symbol is known as the right angle bracket.
- To type a left angle bracket, hold down the Shift key and type the , (comma) key.
- To type a right angle bracket, hold down the Shift key and type the . (full stop) key.
- The / symbol is called the forward slash. The key is just to the right of the . (full stop).
- Wrap the main heading text “A Tale of Two Cities” within <h1> ... </h1> tags.
- Wrap the two “Small Heading” texts within <h2> ... </h2> tags.
- Wrap the “Smaller Heading” text within <h3> ... </h3> tags.
- Wrap the remaining paragraphs of text with <p> ... </p> tags.
- On the last line, wrap the words “Charles Dickens” within italics <i> ... </i> tags.
- And wrap the words “Chapman & Hall” within bold <b> ... </b> tags.
- The body of your HTML file should now look as shown below.
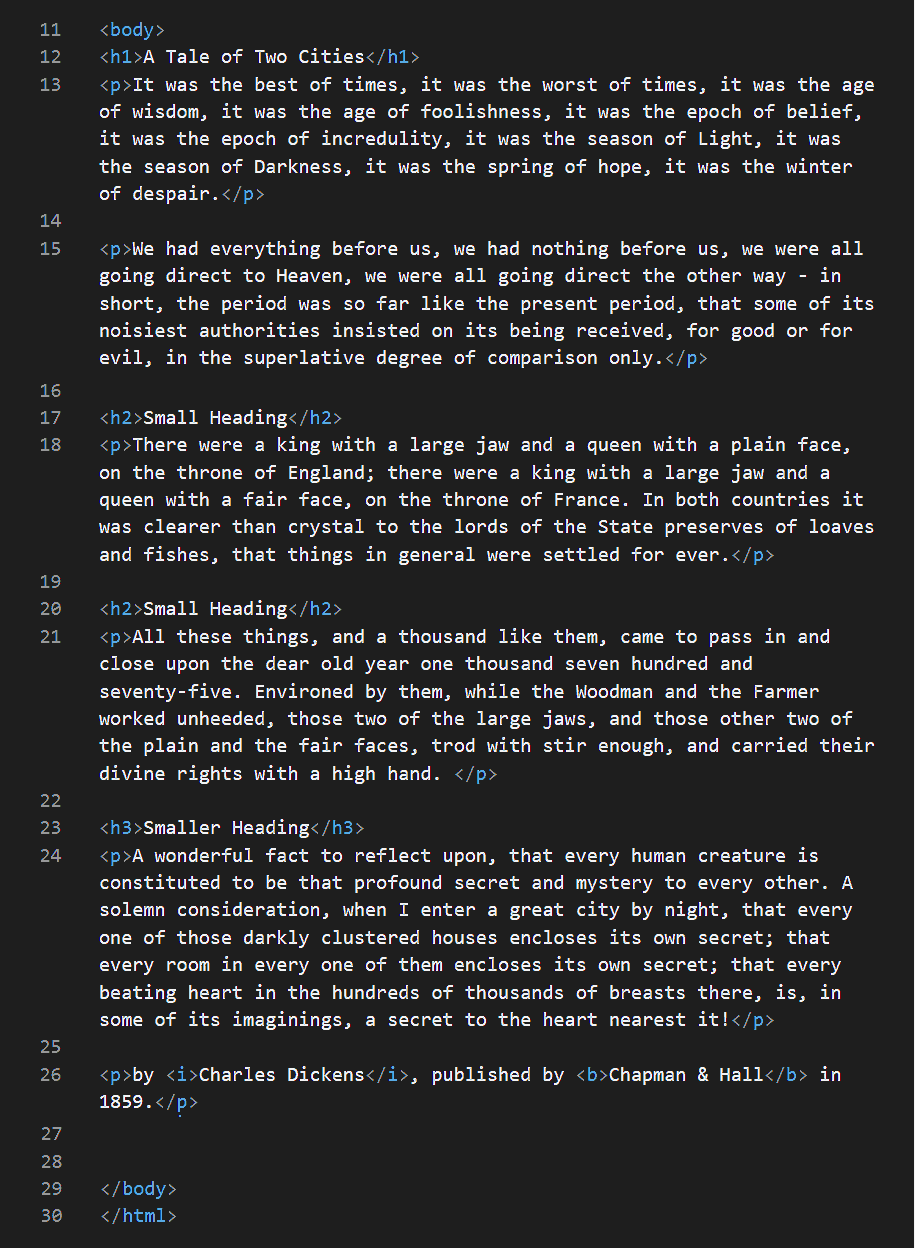
- Save your page-1.html web page file.
- Display your web page in your web browser. It should now look as shown below.
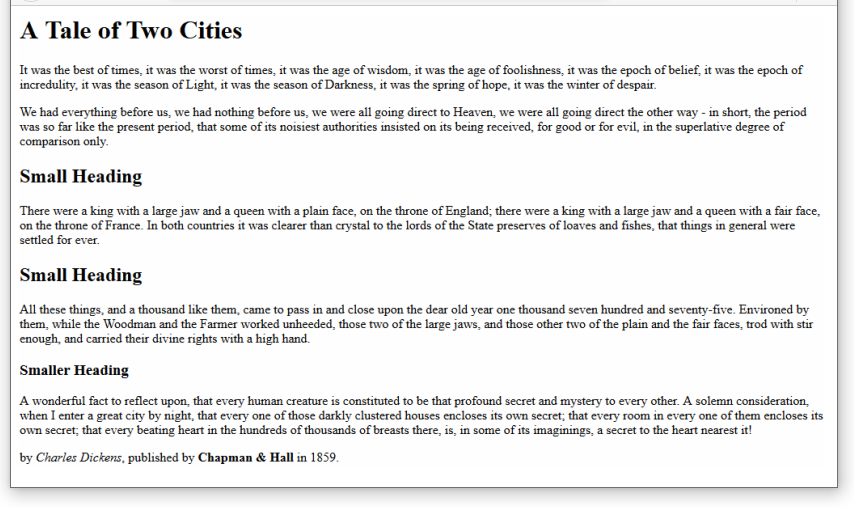
✅ You have now finished working with your first sample web page.
Click page-1.html (final) to view a finished sample of this first web page in a new tab of your web browser.
Creating a second sample web page
In this section, you will use your first sample web page named page-1.html as the basis for creating a second sample web page, named page-2.html.
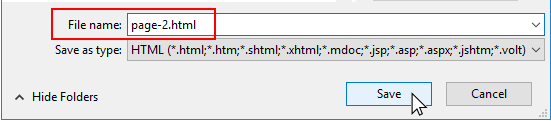
- In VS Code, with the page-1.html file open, choose the File | Save As... command, and save your web page in the 📁 exercises sub-folder of your 📁 websites folder with this new name:
page-2.html
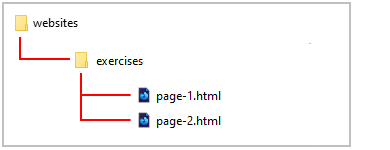
 Your folder and file structure should look as shown below.
DO NOT name your web page with an upper-case ‘P’ as in Page-2.html.
And DO NOT use some other combination of upper and lower-case letters, such as PAGE-2.HTML or page-2.HTML.
Also, DO NOT enter any blank spaces in the name of your file: type page-2.html NOT page - 2.html or page -2.html.
- Drag down and across all the text in the grey box below to select it.
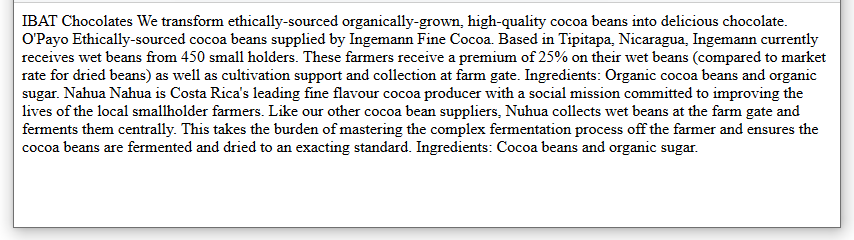
IBAT Chocolates
We transform ethically-sourced organically-grown, high-quality cocoa beans into delicious chocolate.
O’Payo
Ethically-sourced cocoa beans supplied by Ingemann Fine Cocoa. Based in Tipitapa, Nicaragua, Ingemann currently receives wet beans from 450 small holders. These farmers receive a premium of 25% on their wet beans (compared to market rate for dried beans) as well as cultivation support and collection at farm gate.Ingredients: Organic cocoa beans and organic sugar.
Nahua
Nahua is Costa Rica's leading fine flavour cocoa producer with a social mission committed to improving the lives of the local smallholder farmers. Like our other cocoa bean suppliers, Nuhua collects wet beans at the farm gate and ferments them centrally. This takes the burden of mastering the complex fermentation process off the farmer and ensures the cocoa beans are fermented and dried to an exacting standard.Ingredients: Cocoa beans and organic sugar.
- Right-click on the selected text and, from the context menu, choose Copy.
- In VS Code, in your page-2.html file, select all the text inside the <body> ... </body> tags.
- Paste the copied text, so that the new text replaces the old.
- Save your page-2.html file and then display it in your web browser. It should look as shown below.
Your next task is to mark up this text with HTML tags.
Marking up the content in your second web page
Now you will mark-up the text of your web page with the following HTML tag pairs: <h1>, <h2>, <h3> and <p>.
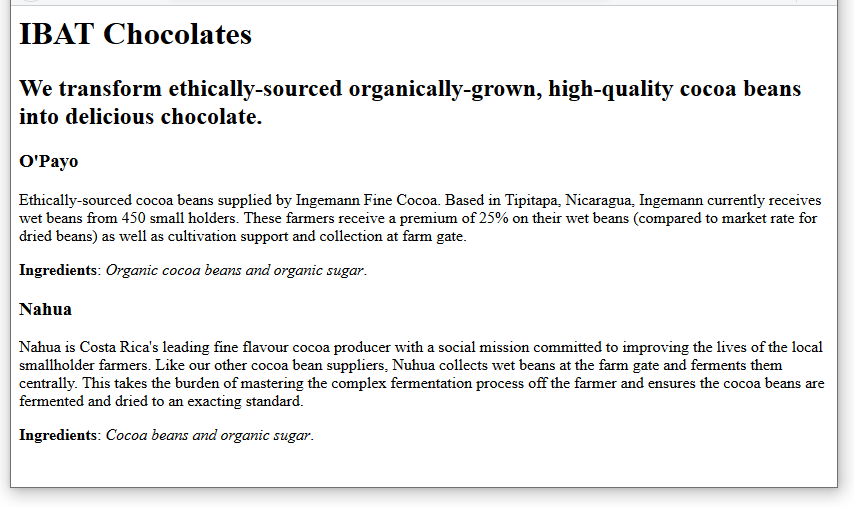
- Wrap the main heading “IBAT Chocolates” within <h1> ... </h1> tags.
- Wrap the entire first paragraph within <h2> ... </h2> tags.
- Wrap the two sub-headings “O'Payo” and “Nahua" within <h3> ... </h3> tags.
- Wrap the remaining paragraphs of text within <p> ... </p> tags.
- Wrap the two words “Ingredients” within bold <b> ... </b> tags.
- Wrap the two ingredient contents within italics tags <i> ... </i> tags.
- The body of your HTML file should now look as shown below.

- Save your web page and display it in your web browser. It should now look as shown below.
- One final step remains: in the <head> of your second sample web page, you need to update the title and the description details.
Copy the marked-up lines below, and paste them into your page-2.html file to replace the old title and description information.
<title>IBAT Chocolates</title>
<meta name="description" content="We transform ethically-sourced organically-grown, high-quality cocoa beans into delicious chocolate.">
The <head> of your web page should now look as shown below.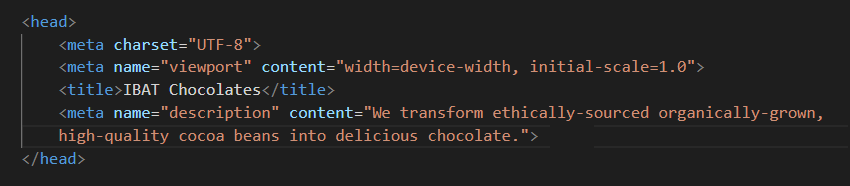
- Save your page-2.html file.
✅ You have now finished working with your second sample web page.
Click page-2.html (final) to view a finished sample of this second web page in a new tab of your web browser.
Creating a third sample web page
In this section, you will create a third sample web page named page-3.html based on a page from the Internet. Here are the steps:
- Click on the following web page to open it in a new tab of your web browser: page-3.html
- Right-click anywhere on the web page and, from the context menu now displayed, choose the View Page Source command.
- Select all the content of the web page. You can do this by:
- Clicking with your mouse in the top-left corner of the page, and then dragging the mouse all the way down to the bottom-right corner of the page.
- Clicking with your mouse anywhere in the page, and pressing the Ctrl key (Windows) or Command ⌘ key (Apple) key along with the letter ‘a’ key (for All).
- Copy the selected content.
- You can now close this tab of your web browser.
- Switch to VS Code, and choose the File | New command.
- In your new, empty web page, paste the content you copied from the Internet.
- Choose the File | Save As... command, and save this new file in the 📁 exercises sub-folder of your 📁 websites folder with the following name:
page-3.html
 Your folder and file structure should look as shown below.
DO NOT name your web page with an upper-case ‘P’ as in Page-3.html.
And DO NOT use some other combination of upper and lower-case letters, such as PAGE-3.HTML or page-3.HTML.
Also, DO NOT enter any blank spaces in the name of your file: type page-3.html NOT page - 3.html or page -3.html.
Correcting HTML mark-up errors in your third web page
Your copied-and-pasted content for page-3.html already contains HTML tags. But with some deliberate errors!
NOTE: To get the most value from this example, ensure you have installed the HTMLHint Extension for Visual Studio Code. See the instructions here.
- In VS Code, look at the coloured line along the bottom of the screen.
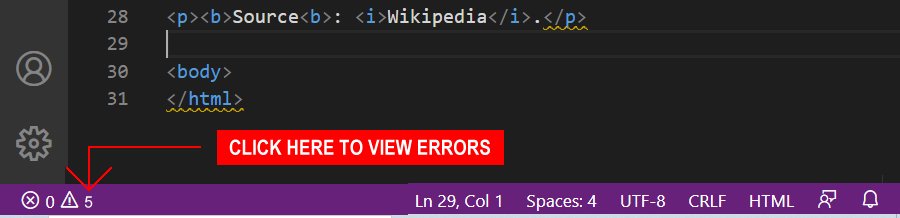 You can see a warning that your web page contains five errors.
 - Click on the number 5 to display the list of errors in the web page. You can also see the line number on which each error occurs.

- Correct the errors and, when finished, resave your page-3.html web page.
- Display the page in your web browser. It should now look as shown below.
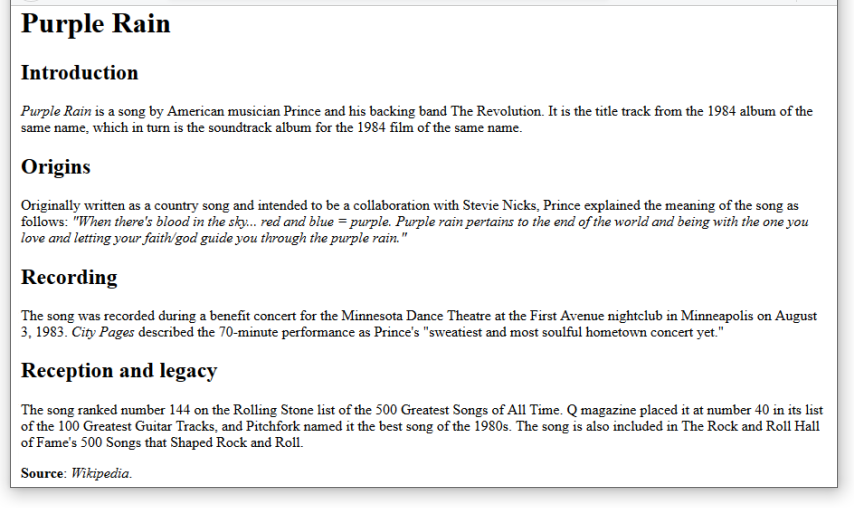
✅ You have now finished working with your third sample web page.
Click page-3.html (final) to view a finished sample of this third web page in a new tab of your web browser.
Creating a fourth sample web page
In this section, you will create a fourth sample web page named page-4.html based on a page from the Internet. Here are the steps.
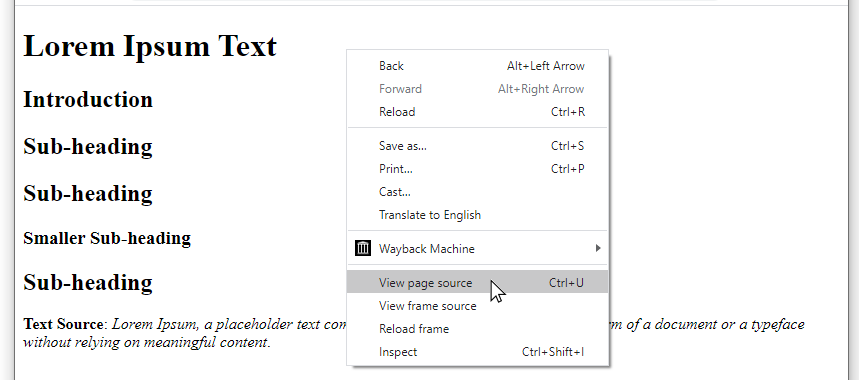
- Click on the following web page to open it in a new tab of your web browser: page-4.html
- Right-click anywhere on the web page and, from the context menu now displayed, choose the View Page Source command.
- Select and copy the entire content of the web page. You can then close this tab of your web browser.
- Switch to VS Code, and choose the File | New command.
- In your new, empty web page, paste the content you copied from the Internet.
- Choose the File | Save As... command, and save this new file in the 📁 exercises sub-folder of your 📁 websites folder with the following name:
page-4.html
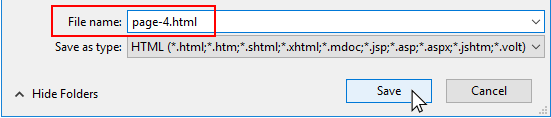 Your folder and file structure should look as shown below.
DO NOT name your web page with an upper-case ‘P’ as in Page-4.html.
And DO NOT use some other combination of upper and lower-case letters, such as PAGE-4.HTML or page-4.HTML.
Also, DO NOT enter any blank spaces in the name of your file: type page-4.html NOT page - 4.html or page -4.html.
Creating lorem ipsum dummy text
Your copied-and-pasted content for page-4.html already contains correct HTML tags.
But you will notice that there is no text within many of the <p> ... </p> tags.
This will not cause an HTML error. It just means that, as a web designer, you have not yet been provided with text content to work with.
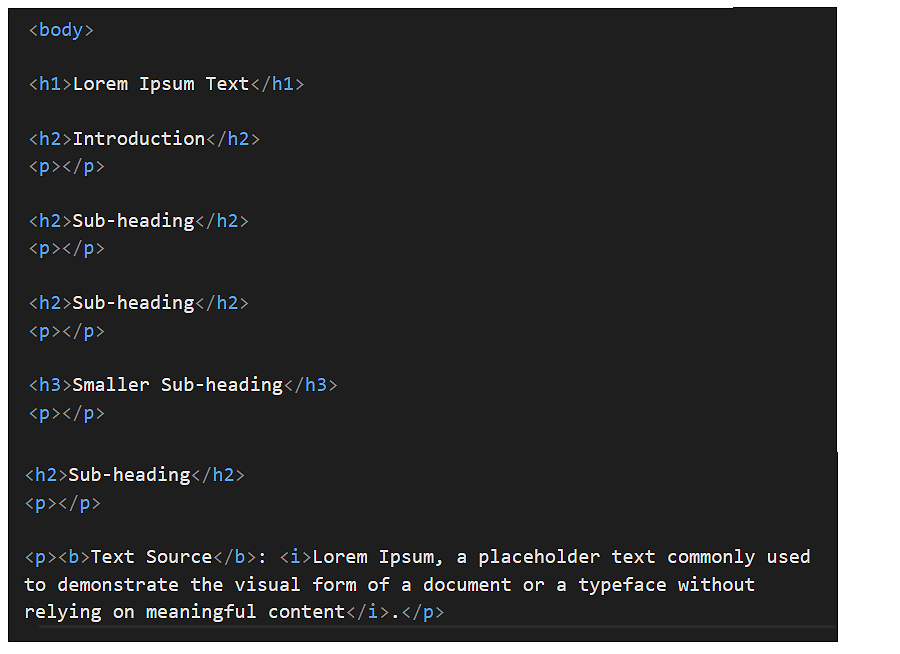
In cases like this, you can use “dummy” or “placeholder” text called Lorem Ipsum. Follow these steps.
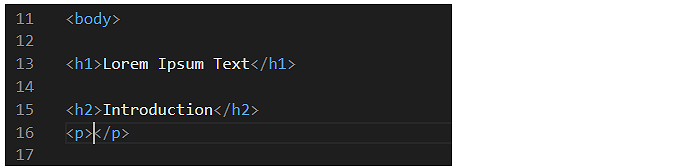
- Click inside the first pair of empty <p> ... </p> tags.
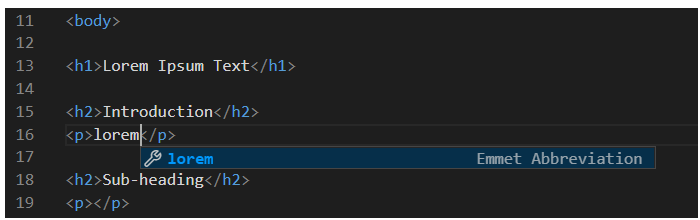
- Type the word “lorem" (without quotes).
- When the Emmet Abbreviation menu appears after one or two seconds, click on it or press the Enter key.
 VS Code now creates 30 words of Lorem Ipsum text, as shown below.
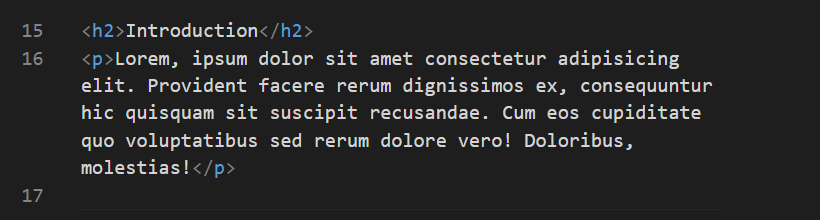
- Repeat this step for the four other remaining empty paragraphs. Note that you can change the number of words of Lorem Ipsum that are generated by typing a number after the word “lorem". For example: lorem40 or lorem12
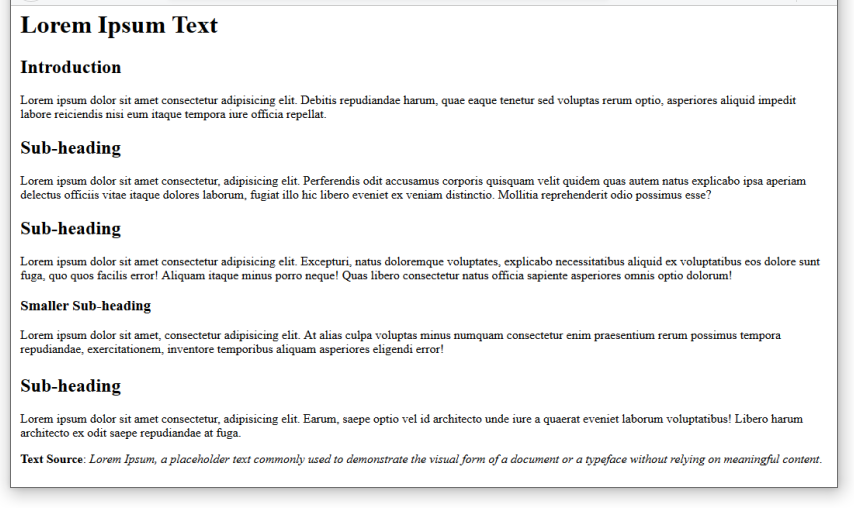
- When finished, save your page-4.html web page and display it in your web browser. It should look similar to that shown below.
✅ You have now finished working with your fourth sample web page.
Click page-4.html (final) to view a finished sample of this fourth web page in a new tab of your web browser.
Creating a home page for your website
In this section, you will use your fourth sample web page named page-4.html as the basis for creating a front or ‘home’ page named index.html for your website.
- In VS Code, with the page-4.html file open, choose the File | Save As... command, and save your web page in your ‘main’ 📁 websites folder this new name:
index.html
 Your folder and file structure should look as shown below.
DO NOT name your web page with an upper-case ‘I’ as in Index.html.
And DO NOT use some other mixture of upper and lower-case letters, such as INDEX.HTML or index.HTML or whatever.
Also, DO NOT enter any blank spaces in the name of your file: type index.html NOT index .html
- In the <head> of your new index.html file, update the title and the description tags by copying and pasting the lines below to replace the old title and description tags and content.
<title>Mary Smith | Home Page</title>
<meta name="description" content="Welcome to my website that showcases some of my digital creations.">
Replace the name “Mary Smith” with your own name. And edit the text as you wish. The <head> of your web page should look similar to the sample below.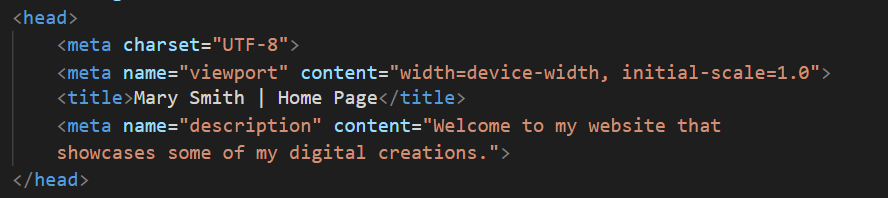
- Delete all the content from inside the <body> ... </body> tags of the web page.
- Enter the new content below.
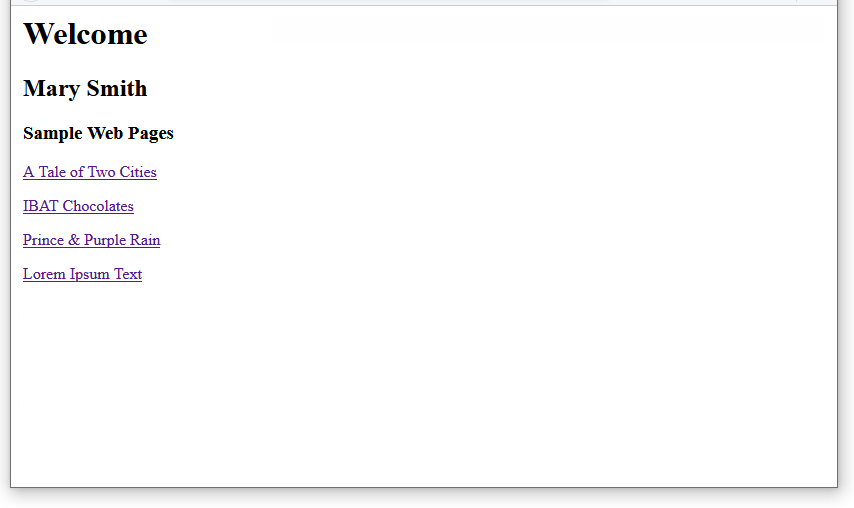
<h1>Welcome</h1> <h2>Mary Smith</h2> <h3>Sample Web Pages</h3> <p><a href="exercises/page-1.html">A Tale of Two Cities</a></p> <p><a href="exercises/page-2.html">IBAT Chocolates</a></p> <p><a href="exercises/page-3.html">Prince & Purple Rain</a></p> <p><a href="exercises/page-4.html">Lorem Ipsum Text</a></p> - Save your web page and view it in your web browser. It should look like that below.
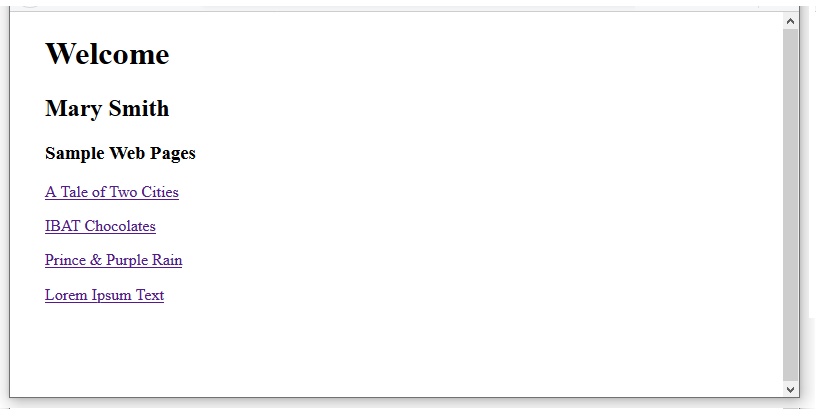
- Click on the four hyperlinks to ensure they all work correctly.
Click index.html (final) to view a finished sample of your home web page in a new tab of your web browser.
✅ You have now finished working with your home web page.
Adding back links to your four sample pages
As a final task, let’s add a hyperlink to each of the four sample web pages that, when clicked, brings the user back to your home web page.
- In VS Code, open the first four sample web pages you created in this Tutorial. All four are in your 📁 websites/exercises sub-folder:
page-1.html
page-2.html
page-3.html
page-4.html - At the end of each file, just before the closing </body> tag, enter the following line.
<p><a href="../index.html">Back to Home page</a></p>

- When finished, save all four web pages.
- In your web browser, open each web page in turn and verify the “Back to Home page” hyperlinks all work correctly.

Click the links below to see final versions of your web pages with the “Back to Home page” hyperlinks included:
page-1.html (final, with back link)
page-2.html (final, with back link)
page-3.html (final, with back link)
page-4.html (final, with back link)
✅ Task completed.
About relative hyperlinks
The hyperlinks in your Home page and at the bottom of your four sample web pages are examples of what are called relative hyperlinks.
A relative hyperlink is a hyperlink that contains the address of a linked-to, destination web page in relation to the location of the file that contains the hyperlink.
Consider the following two examples, each with two web pages, page-1.html and page-2.html:
In the simplest case, the two files are in the same folder.
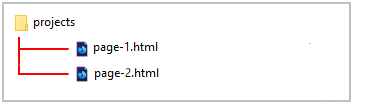
- The hyperlink in the first file that leads to the second file will be as follows:
<a href="page-2.html">Page 2</a>
- Conversely, the link in the second file back to the first file will be.
<a href="page-1.html">Page 1</a>
In each case, there is no need to specify the folder name.
In the second example, the page-1.html file is in a folder one level above the page-2.html file.
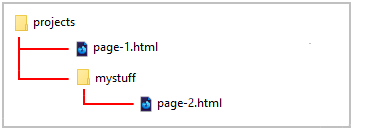
- The link from the first file to the second will now be.
<a href="mystuff/page-2.html">Page 2</a>
In this case, the hyperlink tells the web browser: “Go down one level to a folder named mystuff to locate the file.” - And here is the link from the second file back to the first
<a href="../page-1.html">Page 1</a>
The two dots and the forward slash (../) tell the web browser: “Go back up one level in the folder hierarchy to locate the file.”
You will learn more about hyperlinks in HTML in later Tutorials.
Hiding a web page from search engines
Google and other search engines use software programs called spiders to crawl the web for web pages to add to their list of indexed web pages. Only web pages listed in such an index will appear in search engine results.
If you don't want a particular web page to be found by Google or other search engines, follow these steps:
- Open your web page in VS Code.
- In the <head> of your web page add the following new line:
<meta name="robots" content="noindex">
You can add this anywhere within the head. Typically, it is placed just after the charset line, as shown below.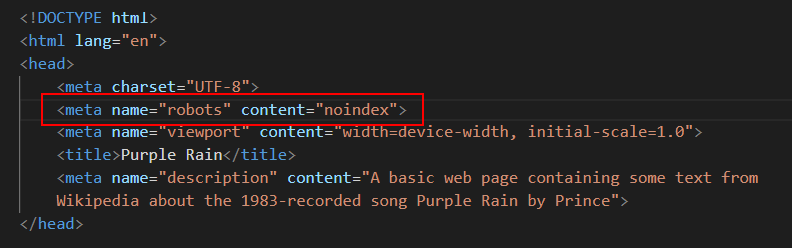
- When finished, save your web page.
Uploading your web pages to GitHub
After creating your web pages, you are now ready to upload them to your account on GitHub.
- Open a new tab in your web browser and go to GitHub.com. If you are not already signed in to your GitHub account, sign in now.

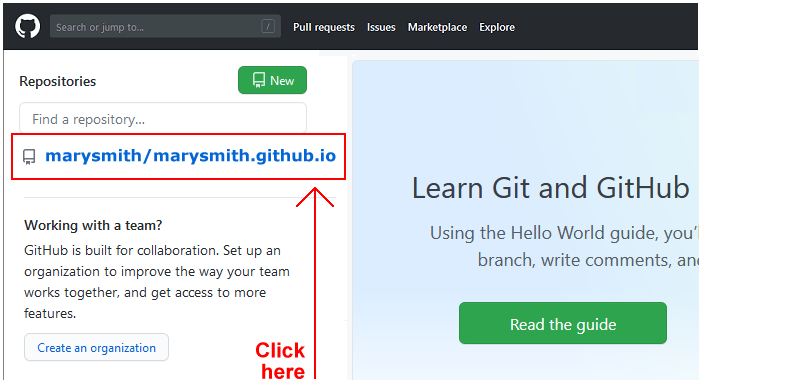
- On your GitHub home page, click the name of the repository (‘repo’) that holds your web pages. Its name will look as follows, where username is your chosen username on GitHub.
username.github.io
- On the next GitHub screen displayed, near the right of the screen, you can see a button named Add file. Click on it.
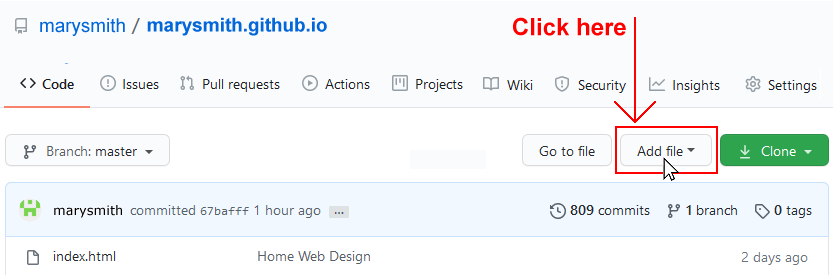
- From the dropdown list displayed, choose the option Upload files.

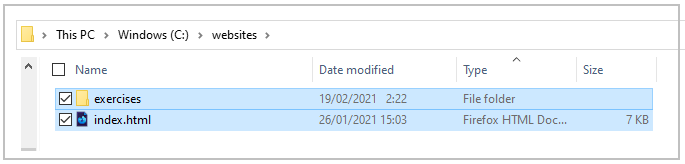
- In File Explorer (Windows 10) or Finder (Apple Mac), drag-and-drop your index.html file and your 📁 exercises sub-folder to upload them to your repository on GitHub.
- Scroll down to the bottom of the GitHub screen, and accept or edit the short message (Add files via upload) in the Commit changes box.
- Finally, click the green Commit changes button to upload your files.
Your web pages are now published on GitHub at web addresses similar to the following, where username is the username you have chosen for your GitHub account:
https://username.github.io/index.html
https://username.github.io/exercises/page-1.html
https://username.github.io/exercises/page-2.html
https://username.github.io/exercises/page-3.html
https://username.github.io/exercises/page-4.html
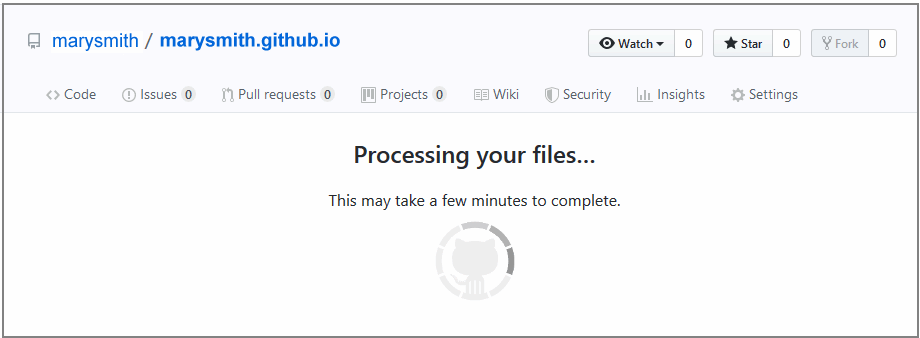
It may take a few minutes for your uploaded files to appear on GitHub.
Adding comments to HTML code
In a web page, a comment is one or more lines of text that are visible only in the source code – but are not actually displayed in the web browser.
You can see an example of a short, one-line comment below.
<!-- This is a comment -->And here is an example of a longer, multi-line comment.
  <!--
  Generated by Animista on 2021-2-3 11:17:9
  http://animista.net, t: @cssanimista
  -->
Follow these steps to create a comment in VS Code.
By default, VS Code displays comments in a dark green colour.