Learning Goals
At the end of this Tutorial, you will be able to:
- Create an object with a name and curly braces {}.
- Add, modify and delete properties within an object.
- Access object properties using dot . notation.
- Destructure properties from an object to variables.
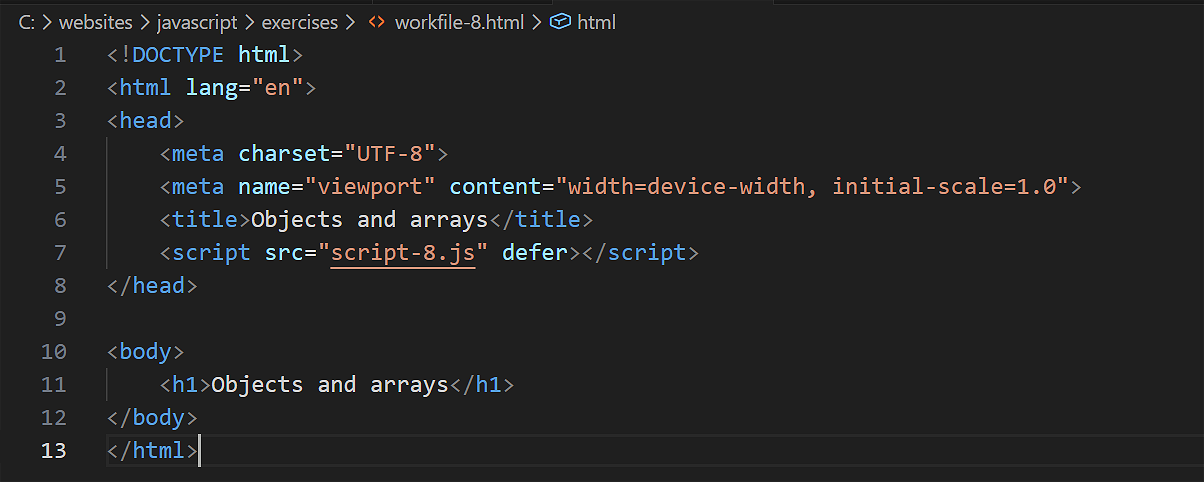
For this Tutorial, you will start with an empty HTML file.
In your javascript/exercises folder, create a new HTML file named workfile-8.html.
Create a new empty text file named script-8.js and save it in this same folder.
Add a link to script-8.js in your workfile-8.html file using a <script> tag with the defer attribute.
Storing spreadsheet-type data as objects
Often, you will want to work with sets of related data about a particular person or thing. Consider the spreadsheet below. For each person, there are four items of data.
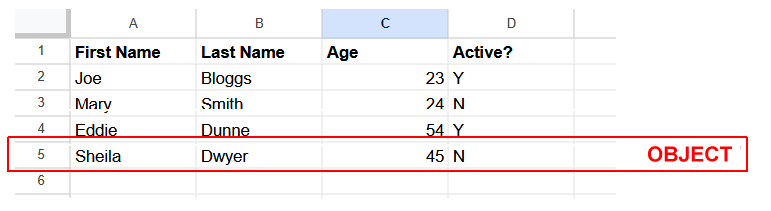
In JavaScript, you can use an object to store such related data. Each item in an object is called a property, and has two parts: a key (name or label) and a value.
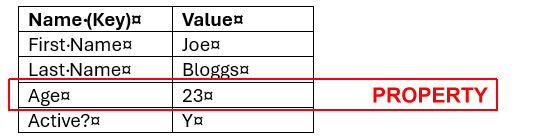
In the above example, the object has four properties, each one with a property key (such as Age) and a property value (such as 23).
Naming your objects
Object keys follow the usual JavaScript rules for names: they are case-sensitive and cannot contain spaces or the dash (-) character. To helo you learn, we will:
- Begin sample object names with obj, such as objUser and objProduct.
- Use singular nouns for object names, such as objProduct rather than objProducts.
Creating an object with {} notation
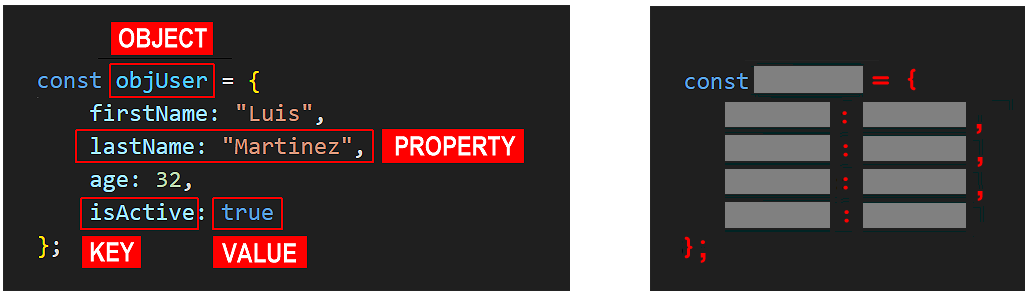
You can create an object using an object name and curly braces {}. This is called object literal notation.
Copy the following code to your script-8.js file.
// Declaring and populating an object
const objUser = {
firstName: "Luis", // string
lastName: "Martinez", // string
age: 32, // number
isActive: true // boolean
};
console.log(objUser);
As you can see, the colon : character separates a key from its value. And the comma , character signals the end of each key-value pair.
Your web browser JavaScript console should now look similar to the following.
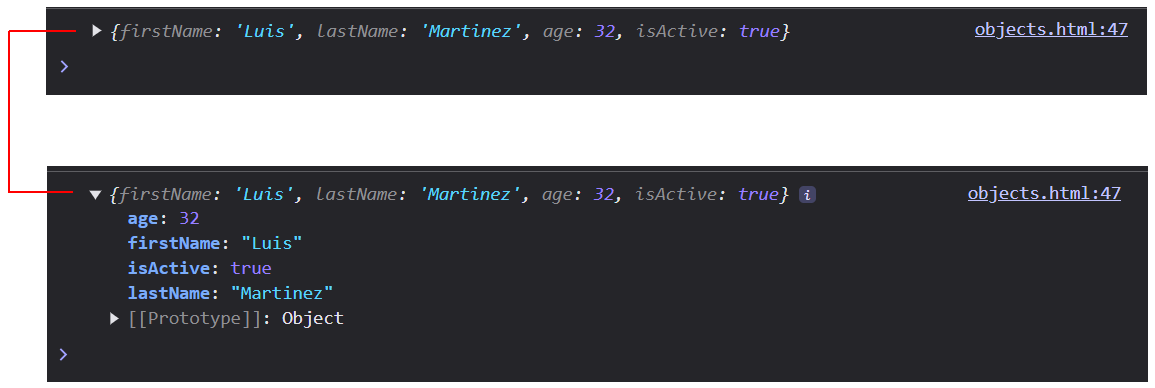
To prevent your objects from being accidentally overwritten, declare them with const rather than let. You can still modify/delete individual properties later if needed.
Displaying a property's value by its key
You can use the key of a property to display its value.
// === Displaying a property inside an object by its key ===
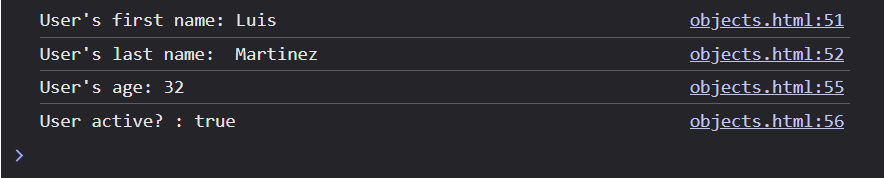
console.log(`User's first name: ${objUser.firstName}`);
console.log(`User's last name: ${objUser.lastName}`);
console.log(`User's age: ${objUser.age}`);
console.log(`User active?: ${objUser.isActive}`);This should output the following to your console.
Working with the properties of an object
You can add a new property (key-value pair) to an object, change the value of a property, and delete a property from an object.
// === Working with the properties of an object ===
// Declaring and populating a new object
const objCar = {
make: "Toyota",
model: "Camry",
year: 2023,
};
console.log("Original object");
console.log(objCar);
// Adding two new properties (key-value) pairs to the object
objCar.color = "Blue";
objCar.isElectric = false;
console.log("Added two new properties");
console.log(objCar);
// Deleting a property from an object
delete objCar.isElectric;
console.log("Removed a property");
console.log(objCar);
// Updating the value within two properties
objCar.color = "Red";
objCar.year = 2012;
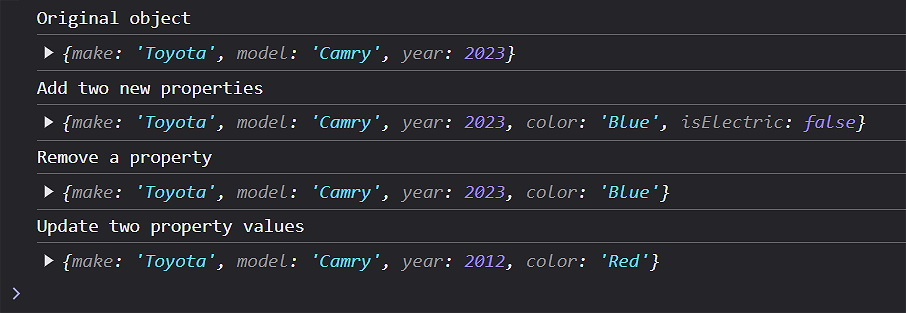
console.log("Updated two property values");
console.log(objCar);Here is the console output of the original object, followed by the various property changes.
Creating an empty object
You can create an object without entering keys or values. See below.
// === Creating an empty object and later adding keys-values ===
// Create empty object
const objPerson = {};
// Add keys and values to an empty object
objPerson.firstName = "Emma";
objPerson.lastName = "Smith";
console.log(objPerson); // {firstName: "Emma", lastName: "Smith"}Object destructuring
Up to now, we have accessed a property value in an object by its key (name). For example:
// === Accessing an object property by its key ===
console.log(`User's first name: ${objUser.firstName}`);
We can also use this method to assign a property value from an object to a single variable we can use in our code.
// === Assigning object value to a variable ===
const varFirstName = objUser.firstName;
console.log(`The first name of the user is: ${varFirstName}`);When working with objects containing lots of properties (key-value) pairs, this method can become very repetitive. A newer and shorter method is called destructuring.
Object destructuring allows you, with just a single line of code, to:
- Extract several properties from an object.
- Assign the extracted properties to variables.
Destructuring: reusing property keys as variable names
In the simplest case, you can reuse the object keys (names) as variable names in your code. For example:
// === Destructuring by reusing property keys as variable names===
const { firstName, lastName, age, isActive } = objUser;
// Object's properties are now inside variables
console.log(`User's first name: ${firstName}`);
console.log(`User's last name: ${lastName}`);
console.log(`User's age: ${age}`);
console.log(`User active?: ${isActive}`);As you can see, the property values of the object objUser are now available as individual variable values in your code.
Destructuring: using different variable names
Sometimes, you may want to use different variable names than the property keys in the object. You can do this by using a colon : followed by the new variable name. For example:
// Destructuring with different variable names
const { firstName: customerFirstName, lastName: customerLastName } = objUser;
console.log(`New variable names: ${customerFirstName} ${customerLastName}`);Try it yourself
In your workfile...
---
Create an object called objBook with the following properties and output each property to the console:
title (string)

     author (string)

     year (number)

     isAvailable (boolean)
---
Create an object called objComputer with properties for brand, model, and price. Then:
- Add a new property called inStock and set its value to true
- Update the price
- Delete the model property
- Output the object to the console after each change
---
Create an object called objProduct with properties for name, price, and category. Use object destructuring to:
- Extract all properties to individual variables
- Extract only name and price, with price renamed to productPrice
- Output the extracted values to the console.
More learning resources
Tutorial Quiz
Tutorial Podcast
Sample AI prompts
Write a series of code examples that show different ways to manipulate object properties - adding, updating, and deleting properties. Include error cases that might occur when working with objects and explain why they happen.
Create a step-by-step explanation of how object destructuring works in JavaScript, with examples comparing traditional property access versus destructuring. Include cases where you rename variables during destructuring.