Project Goals
In this second stage of the MERN project, you will:
- Create a new database and collection on MongoDB Atlas, and import sample JSON-format data into the collection.
- Set up routes in your Express app to create, read, update, and delete data.
- Create a Mongoose data model for your MongoDB products collection.
- Set up backend routes in your Express app to create, read, update, and delete product data.
Creating a database and collection
Follow the steps below:
- Download the MOCK_DATA.json file.
-
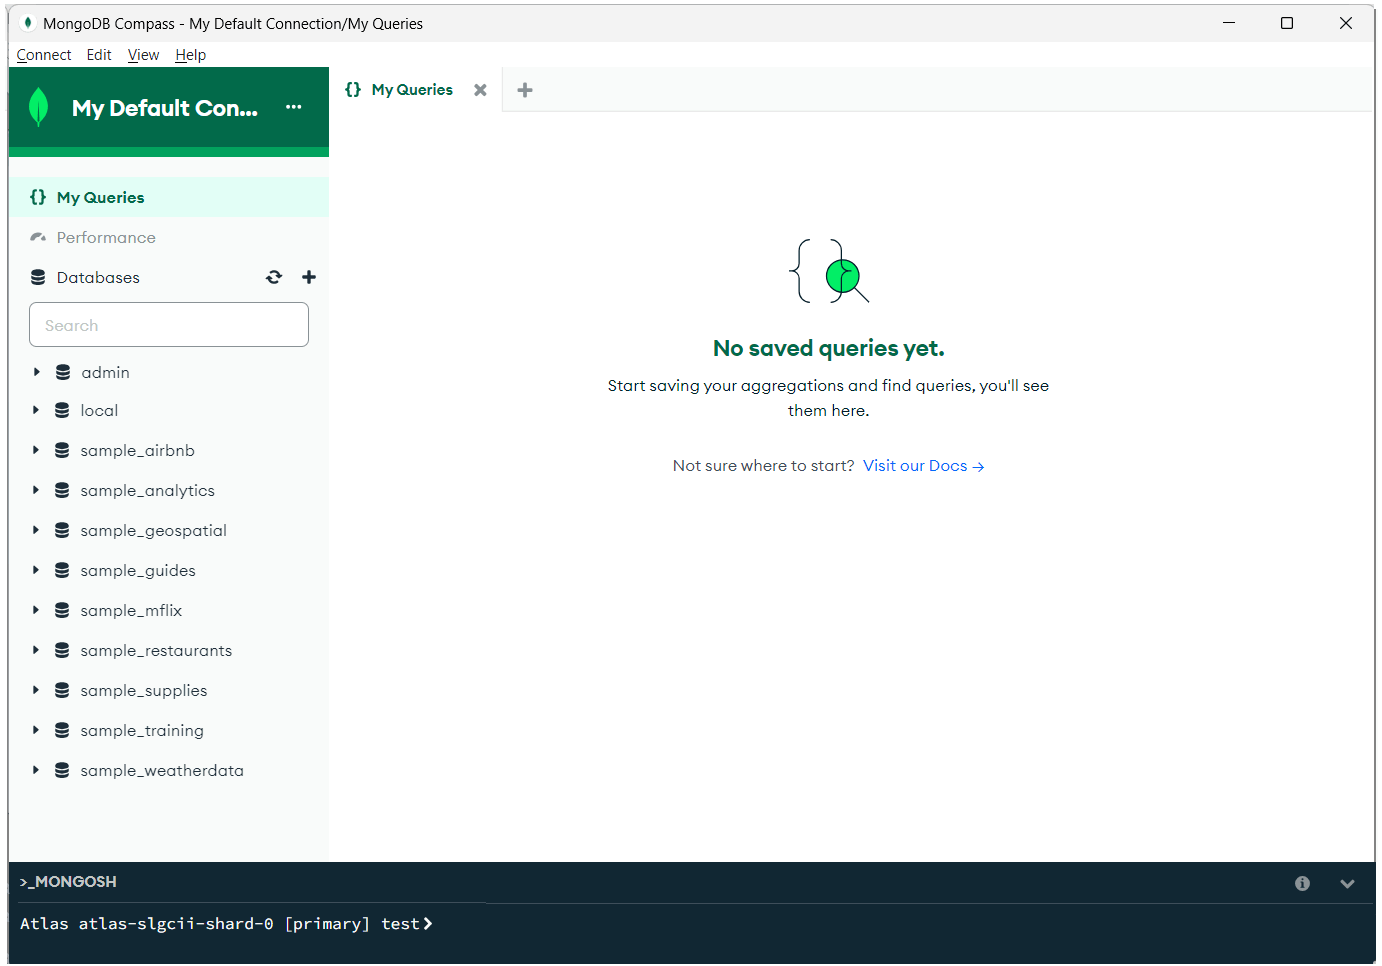
Launch the Compass app and connect it to your account on MongoDB
Atlas. You should see a screen similar to that below.
-
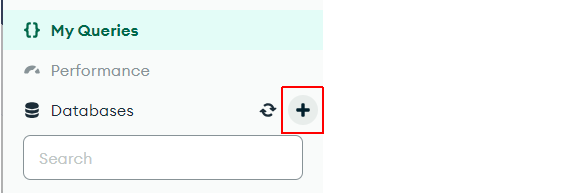
In the left column, beside the Databases heading, click the
plus (+) icon.
-
Enter the names for your database and collection. For example,
db_ecommerce and products.

- Click the Create Database button.
Now, you are ready to add data to your database and collection.
Importing sample JSON data
With the products collection selected in the left column:
-
Click the dropdown arrow at the right of the
ADD DATA button and select Import JSON or CSV file.

-
Select the MOCK_DATA.json file and, on the next screen,
click the Import button.

-
You should now see a screen similar to the following.

Note that MongoDB has automatically added a field named _id to each document.
Viewing data with VS Code extension
To view your database and collection with the VS Code extension for MongoDB, follow the steps below:
- In the left Activity Bar, click the MongoDB extension icon.
-
Click and expand the db_ecommerce database,
products collection, and individual documents. See the
sample screen below.

Updating your .env credentials
Now that you have created a new database in MongoDB Atlas, you need
to update your .env file in the /backend folder with
the database name:

Also in the
/backend folder, update your index.js file.
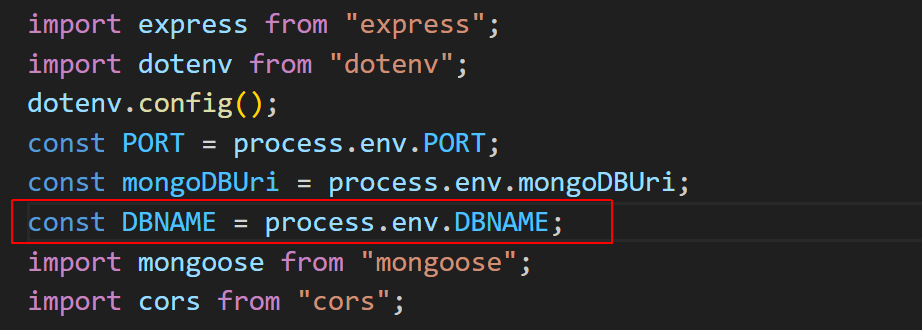

Because you have updated the .env configuration file, you need to restart the backend Express server.
Creating the product data model
Your next step is to create a model for the product data using the Mongoose package.
- In your /backend folder, create a /Models sub-folder.
-
In this sub-folder, create a products.js file and add to it
the following code:
import mongoose from "mongoose"; const productSchema = new mongoose.Schema({ title: { type: String, required: true, }, description: { type: String, required: true, }, price: { type: Number, required: true, }, discountPercentage: { type: Number, required: true, }, rating: { type: Number, required: true, }, stock: { type: Number, required: true, }, brand: { type: String, required: true, }, category: { type: String, required: true, }, thumbnail: { type: String, required: true, }, images: { type: String, required: true, }, }); // Add data to schema to create model const Product = mongoose.model("Product", productSchema); export default Product;
Adding CRUD product routes to index.js
In your /backend folder, in your index.js file, add the products.js file to the import statements.
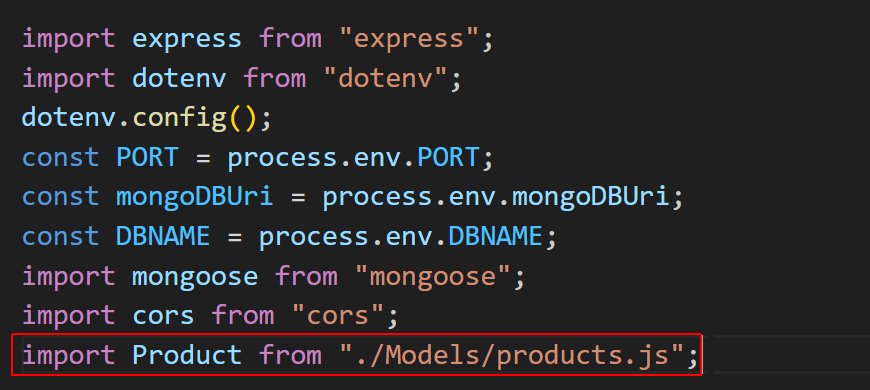
Also in your index.js file, add the following CRUD routes. (You will later move these routes to a separate file.)
//Create a new product
app.post("/create", async (req, res) => {
const newProduct = new Product({
title: req.body.title,
description: req.body.description,
price: req.body.price,
discountPercentage: req.body.discountPercentage,
rating: req.body.rating,
stock: req.body.stock,
brand: req.body.brand,
category: req.body.category,
thumbnail: req.body.thumbnail,
images: req.body.images,
});
await Product.create(newProduct);
res.send("Product saved to the database!");
});//Get the all product list
app.get("/read", async (req, res) => {
const productList = await Product.find();
res.send(JSON.stringify(productList));
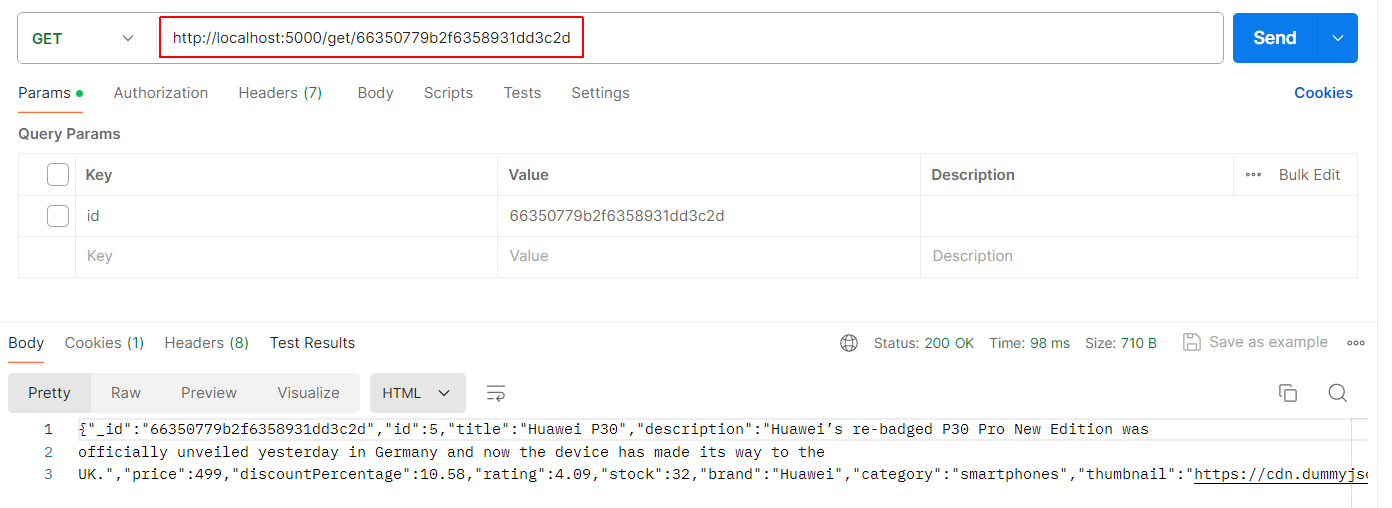
});//Get a single product by id
app.get("/get/:id", async (req, res) => {
const product_id = req.params.id;
const product = await Product.findById(product_id);
res.send(JSON.stringify(product));
});//Update a product based on the id
app.put("/update/:id", async (req, res) => {
const product_id = req.params.id;
await Product.findByIdAndUpdate(product_id, {
title: req.body.title,
description: req.body.description,
price: req.body.price,
discountPercentage: req.body.discountPercentage,
rating: req.body.rating,
stock: req.body.stock,
brand: req.body.brand,
category: req.body.category,
thumbnail: req.body.thumbnail,
images: req.body.images,
});
res.send("Product updated successfully!");
});
//Delete a product based on the id
app.delete("/delete/:id", async (req, res) => {
const product_id = req.params.id;
await Product.findByIdAndDelete(product_id);
res.send("Product deleted!");
});Testing your GET routes with POSTMAN
Use POSTMAN or similar to test your two backend GET routes are working correctly. For example:

Project checklist and next step
Before continuing:

CHECK that your two backend GET routes to the products collection on MongoDB are working correctly.
You are now ready to update your ReactJS frontend as a single-page application (SPA) with pages and components.