Project Goals
In this first stage of the MERN project, you will:
- Use Vite to scaffold and run the ReactJS frontend layer of your MERN app.
- Install an Express server to provide the backend layer of your MERN app. You will also install the mongoose, cors, dotenv and nodemon packages for the backend.
- Update the frontend and backend package.json files with relevant details, including your name.
- Add backend .env and .gitignore files.
- Verify that the frontend and backend servers run correctly.
NodeJS and MongoDB Compass
Before continuing, ensure you have installed the following on your local machine:
- NodeJS
- MongoDB Compass
- MongoDB Atlas Extension for VS Code.
You also need an account with MongoDB Atlas.
1: Scaffolding your frontend with Vite
Vite is a modern build tool that provides a streamlined workflow for building web applications, especially those using React. It has replaced the older utility called create-react-app.
Note that Vite creates JavaScript files that end in .jsx instead of .js.
Follow these steps to scaffold your app with Vite:
-
In a terminal, navigate to where you want to create the folder to
hold your MERN app, and then create the folder. For example:
app-mern-ecommerce:
C:\my-apps\app-mern-ecommerce>
-
In this app-mern-ecommerce folder, type the following
command that includes the name you want to call the frontend layer
of your new app. In this example, let's name it frontend.
npm create vite@latest frontend -- --template react

-
If you have not already Vite installed globally, you will be
prompted to install it locally for this project.

-
When Vite completes its build process, you will see the message
below.

-
Follow these instructions to continue building your app, and then
running it.

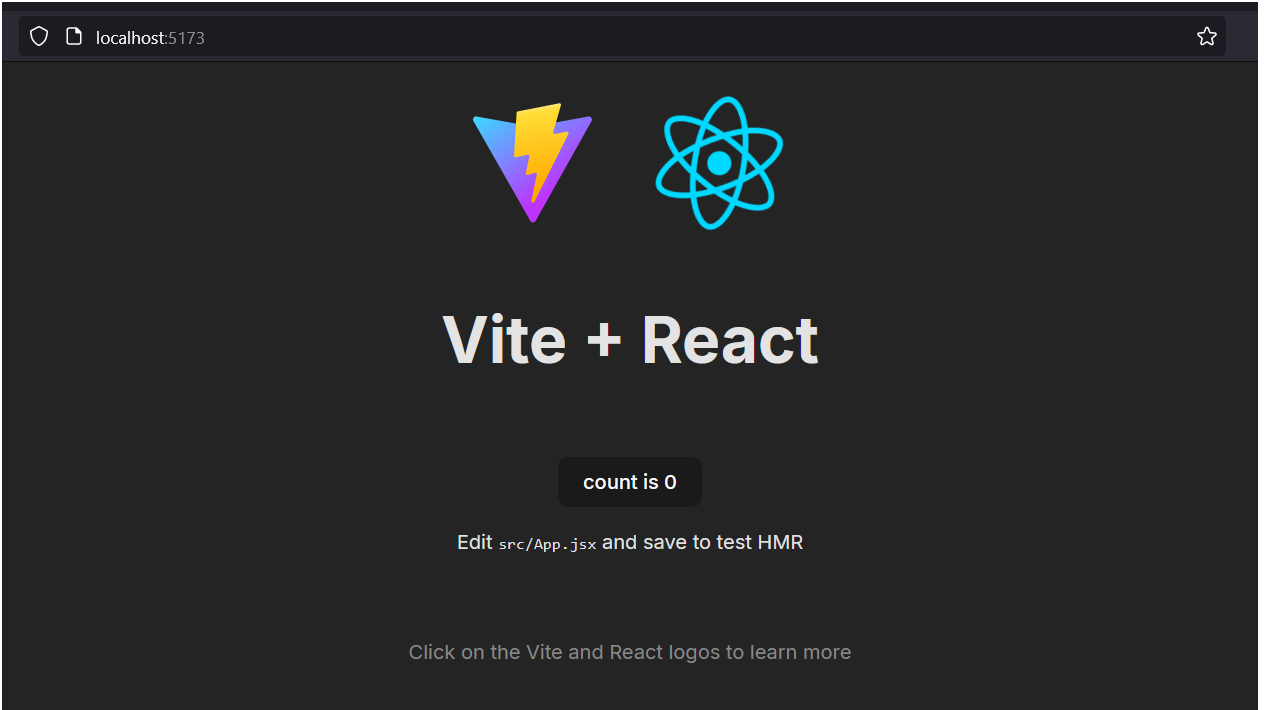
When you launch your new app with npm run dev, it should look as shown below in your browser on the Vite default port of 5173.

ReactJS folders and files
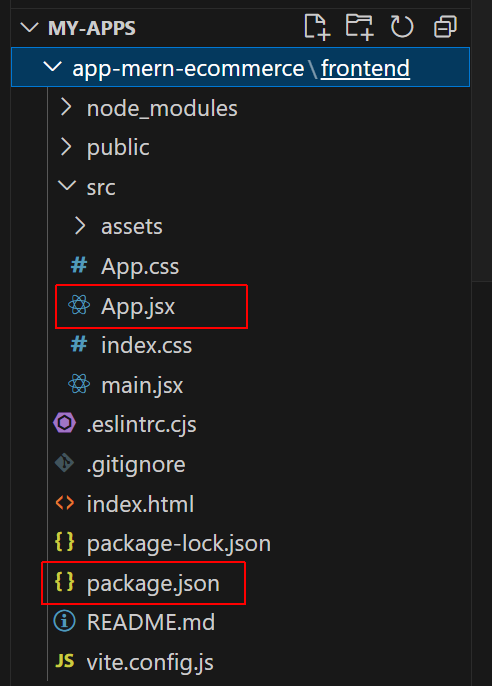
Vite will create the following hierarchy of folders and files.

You could place all the code for your ReactJS frontend app in the App.jsx file. But it is better practice to use App.jsx as a parent component that imports other, single-purpose child components.
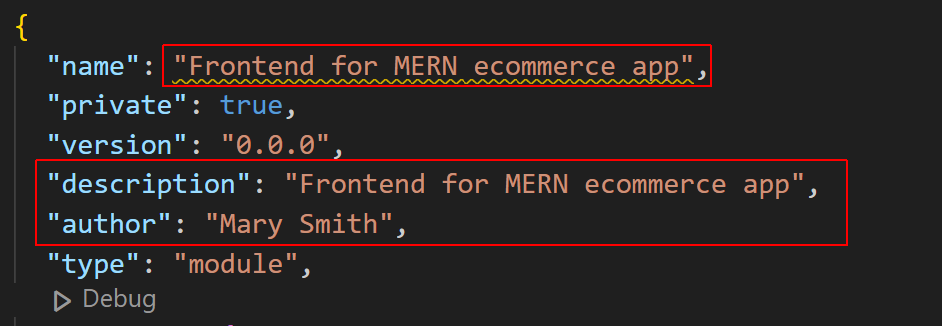
Update the package.json file as shown below. Replace ‘Mary Smith’ with your own name.

2: Setting up your Express backend
Follow the steps below:
-
In your app folder (for example, app-mern-ecommerce),
create a sub-folder for the backend layer. Let's name this
sub-folder backend.

-
In a terminal, navigate to this new sub-folder. For example:
C:\my-apps\app-mern-ecommerce\backend>
-
Run the following command to create an npm project with a
package.json file for your backend layer:
npm init -y
-
Install the following modules locally:
npm i express mongoose cors dotenv -
Next, install the nodemon module locally as a dev dependency:
npm i --save-dev nodemon
-
In your /backend folder, create a new text file and name it
.env.
Enter in this file a port number (for example, 5000) and
your
MongoDB Atlas credentials.

-
In your /backend folder, create a second new text file and
name it
.gitignore
Enter in this file the following:
node_modules/
.env
-
In your /backend folder, create a third new text file and
name it index.js.
 Paste into this file the following code:
import express from 'express' import dotenv from 'dotenv' dotenv.config() const PORT = process.env.PORT; const mongoDBUri = process.env.mongoDBUri; import mongoose from 'mongoose'; import cors from 'cors' const app = express() // Middleware app.use(cors()) app.use(express.json()); // Response sent to browser app.get("/", (req, res) => { res.send("Hello Web Browser!"); }); async function connectToMongoDB() { try { await mongoose.connect((mongoDBUri), { useNewUrlParser: true, useUnifiedTopology: true }); console.log('Express app connected to MongoDB'); app.listen(PORT, () => { console.log(`Express app listening on port ${PORT}`) }) } catch (error) { console.error('Could not connect to MongoDB', error); } } connectToMongoDB(); -
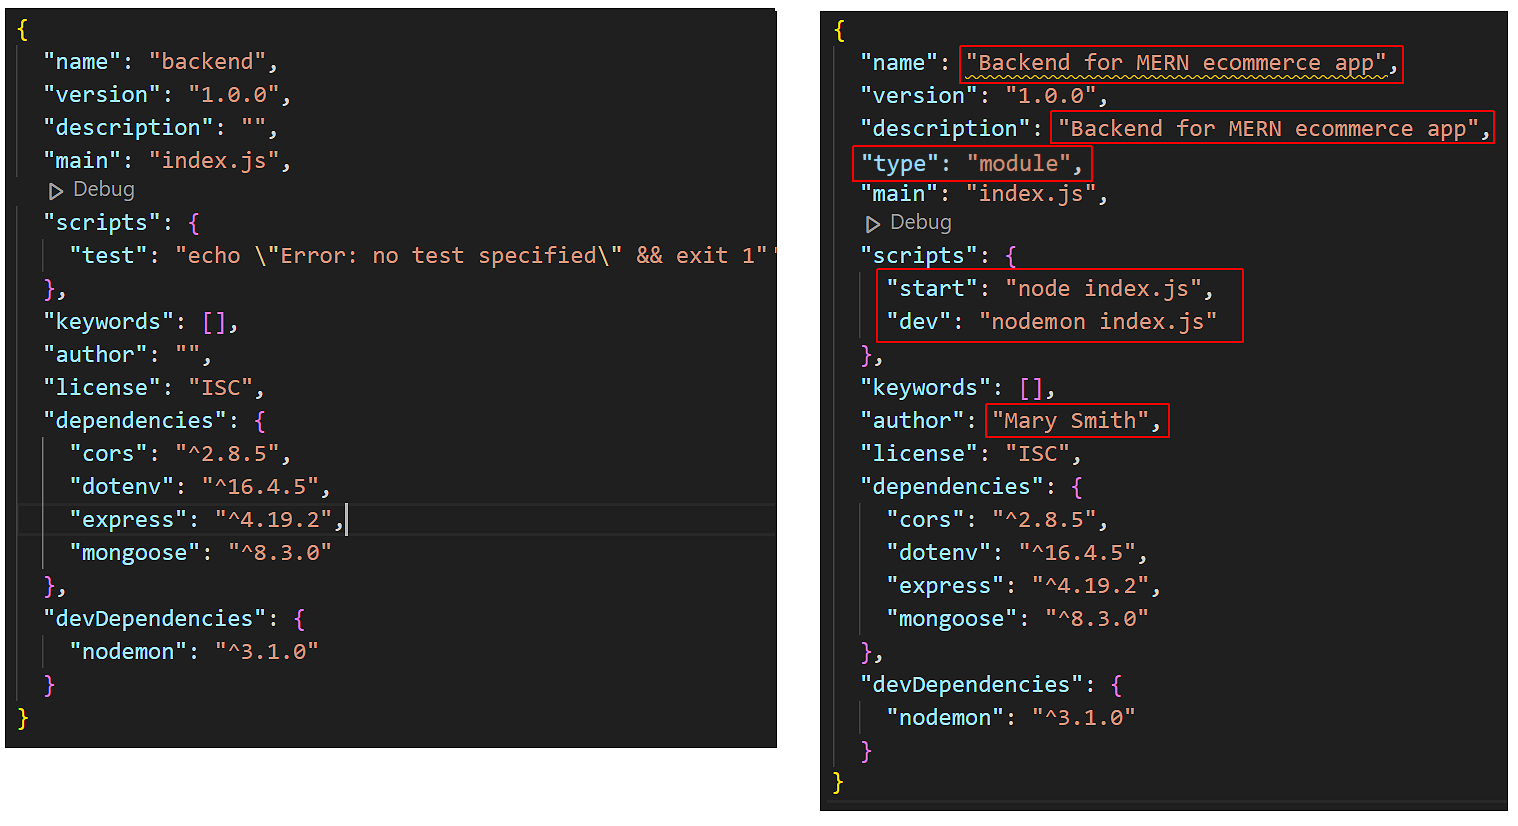
In your /backend folder, open your
package.json file. It should look similar to that shown on
the left below. Update this file as shown below on the right.
 Replace the name ‘Mary Smith’ with your own name.
-
Finally, in your terminal, start your new Express server:
npm run dev
Your terminal window should look as follows:

And you should see the following in your web browser for your chosen port number.

Note that JavaScript files in your /backend app end in .js, unlike your /frontend JavaScript files that end in .jsx.
3: Project checklist and next step
Before continuing:

CHECK that your ReactJS frontend server is running correctly, typically on port 5173.
CHECK that your Express backend server is running correctly, typically on port 5000.
CHECK that you have added a backend .gitignore file to prevent the /node_modules folder from being pushed to GitHub.
CHECK that you have added your name to the frontend and backend package.json files.
You are now ready to add a data model and routes to your MERN project.